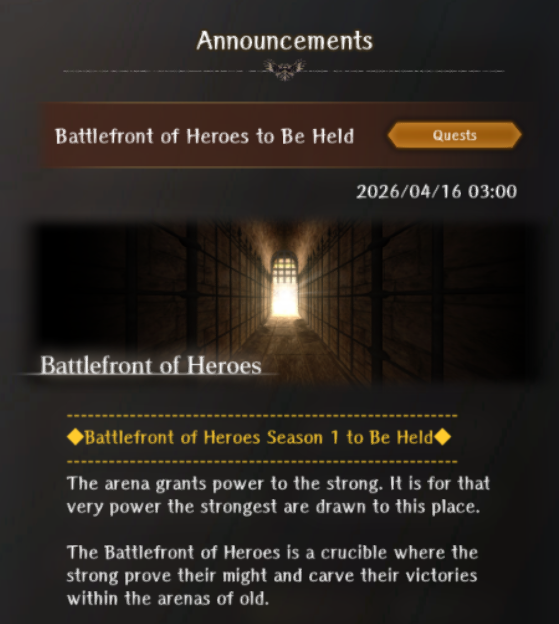
Battlefront of Heroes - Season 1
Work In Progress
- The page will be heavily updated over the coming days with more details.
- Visit the Discord and go to the the Forums - Battlefront of Heroes - Season 1 channel for the most up-to-date information and strategies.
Critical Warnings
Before You Begin - Read Me
- Major Constraints
- Once a League has been cleared it cannot be reset. You are automatically advanced to the next one.
- The Hero League is a massive difficulty spike. It may not be possible for a normal player to survive the first round. Only a handful of players globally have cleared it to-date.
- These two constraints have serious implications on the event's other mechanics.
- Hero's Sigil: Dark
- The medal is a one-time only reward. It cannot be farmed, removed, or transferred to another unit. Every time you clear a League the units in your roster gain +1 Level to the passive.
- Operate on the assumption that L3 is the effective maximum and plan what units you want to register and in what League order.
- Only the first 8 units registered in the Aspirant League have the potential to reach L3 or L4.
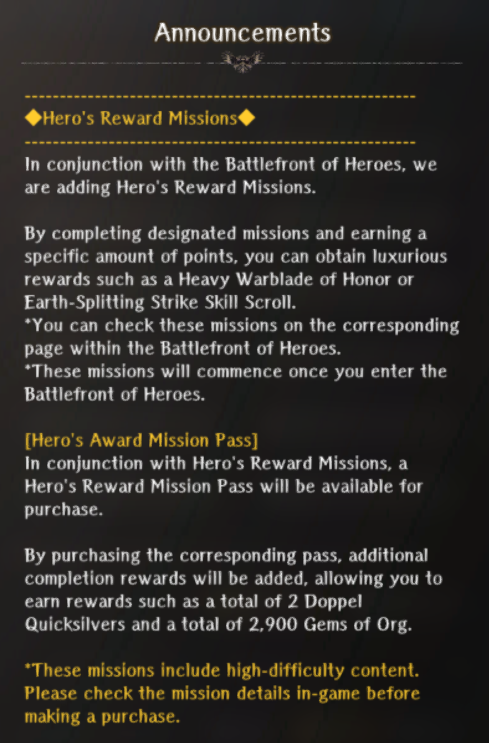
- Hero's Reward Missions
- It is possible to lock yourself out of receiving all the Mission rewards if you do not complete the Special, Damage: One-hit, and Damge: Total achievements in a lower League.
- We -strongly- recommend:
- Complete at least the Special and Damage: One-Hit achievements in either the Aspirant or Adept Leagues.
- Wait to clear the Elite League until after you have finished all of the Hero's Reward Missions, which requires 6,500 points.
- There is a 1,820 point margin before needing to touch the Hero League. This is helpful if you cannot clear Elite, fulfill certain requirements, or miss the weekly points.
- Doppel Quicksilver
- For F2P the 4th Doppel Quicksilver is locked behind clearing the Hero League. This means a maximum of 75 Mastery (Discipline) experience.
- Paid pass holders can get up to 5 prior to the Hero League at 1,500 and 3,000 points, respectively.
Overview
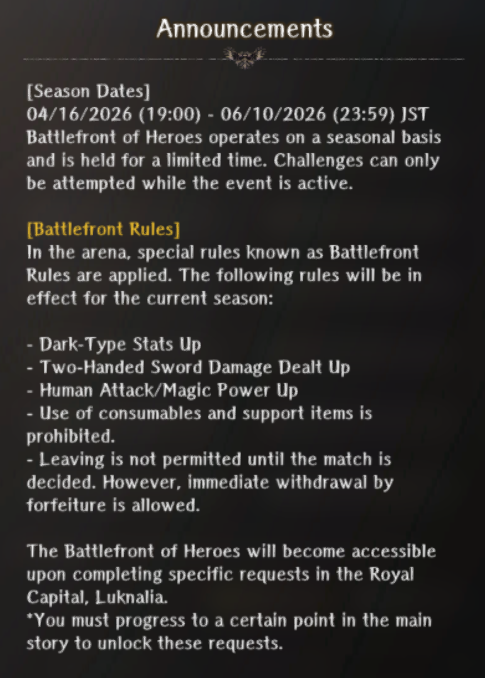
- Event Period: April 16 - June 10. Drecom has announced plans to release future seasons on an ongoing basis.
- Battlefront of Heroes is a standard, arena-style challenge with 4 Leagues. The difficulty level, number of matches, and roster size increases as you progress.
- Each season spotlights a subset of units that are granted a special set of buffs based on certain attributes. For Season 1 it is Dark, Human, and 2H Swords. Class or alignment may be added in future seasons.
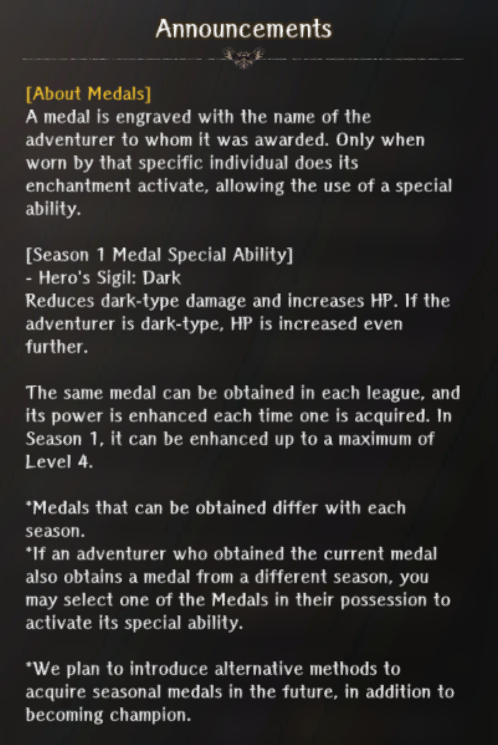
- Clearing a League rewards a medal that gives a permanent passive, which can be leveled up. See Hero's Sigil: Dark for details.
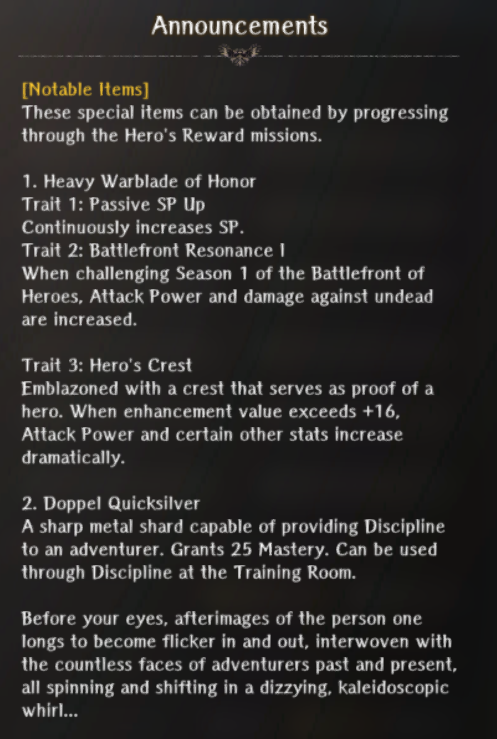
- The Hero's Reward Missions offer up to 4 Doppel Quicksilver, a new item, which gives 25 Mastery (Discipline) experience to any unit. The other unique reward is a 2H Sword, the Heavy Warblade of Honor.
Requirements
- Battlefront of Heroes unlocks after defeating the first Greater Warped One and saving the King.
- Enter the Royal Capital for a brief cutscene. Go to the Beginning Abyss - BF2.
- Speak with the noble. Your choice does not matter.
- Speak to the receptionist, Beth, to learn more about the arena's rules and mechanics.
- Select "Participate", choose up to 8 members for your roster, and head to the right-hand room to begin your first match.
Mechanics
Basics
| League Name | # of Combatants | # of Rounds |
|---|---|---|
| Aspirant | 8 | 5 |
| Adept | 12 | 10 |
| Elite | 16 | 15 |
| Hero | 20 | 20 |
- There are 4 Leagues this season. The number of rounds starts at 5 and grows by +5 per League to a maximum of 20.
- Enemy levels scale based on the MC's Grade level.
- Warning! After a League is cleared it cannot be re-attempted. You are automatically advanced to the next tier. The Hero League is the only exception and can be repeated for the weekly Hero's Mission achievements.
- Warning! The Hero League is a massive difficulty spike. Even the biggest "whales" are having a difficult time clearing it without exploits. It is unclear if Drecom plans to adjust the difficulty or leave as-is.
- For the first League you can register up to 8 members. Each subsequent League lets you add +4 more members up to a maximum of 20.
- You do not have to use the same units for each League, but it is -highly- recommended due to how the medal leveling system works.
- Dispatched units cannot be registered.
- If you fully exit and reset the Battlefront of Heroes, then you must re-register all units.
- Before each round you can re-arrange your active party using the red "people" icon in the upper right-hand corner.
- Speak to the Blackiron Warden for a preview of the enemies for the next round. It does not show enemy row placements.
- To heal the unit must be in your active party.
- To change equipment the unit does not need to be in your active party.
- You can use a Resistance buff while in the waiting room or while in the arena before engaging with the enemy.
- Referee Intervention
- The Referee can set buffs or debuffs at the start of a match. It is limited to a small number of fights per League and not randomized.
- The debuffs are not permanent and can be removed with Abit. Priests learn Abit at Level 40 and it is Daniel's Potential inherit. Note that Abit 2 can remove 2 debuffs from an entire row.
- The debuffs are extremely powerful. We recommend clearing them immediately or not bringing affected units.
- The racial debuffs (Beastfolk, Elf) seem to lower all of a unit's stats by a % amount.
- Flee
- You can Flee at any time with 100% success. Any effects sustained in combat will carry over. This includes regenerated SP/MP from skills, an effect which can be abused to recharge mid-way through the league.
- No progress is lost. Any damage done or enemies killed add to totals for mission completion requirements.
- You are sent back to the waiting area, and can repeat the attempt an unlimited number of times.
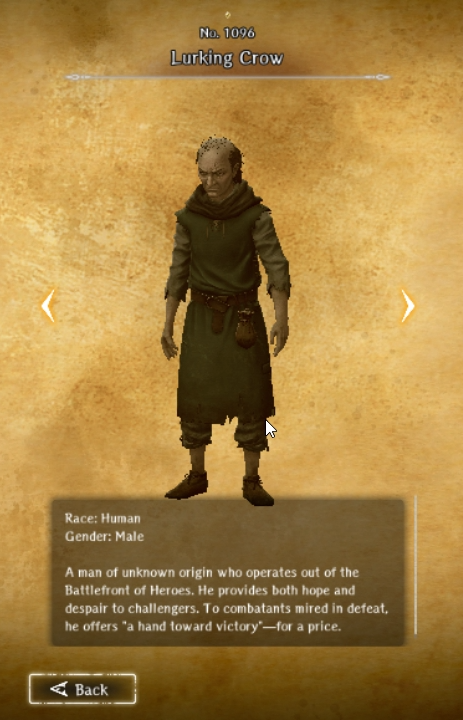
- In earlier leagues the Blackiron Warden may require you go talk to the Lurking Crow before re-entering.
- If MC dies:
- "Rise again"
- Revived and transported back to the waiting room in your pre-battle condition.
- Consumes a Flame of Reawakening. League progress is not lost.
- "Be carried out"
- MC is revived with 1 HP. Any MP or SP used in the previous fight is not restored. Units that were not revived prior to the MC's death stay dead.
- Does not consume a Flame of Reawakening. League progress is not lost.
- "Rise again"
- If a party member dies:
- If revived they will lose 30 Fortitude as usual. Once Fortitude reaches 0 the unit is "dead" and can no longer be used. Fortitude does not recover while in the arena or waiting area.
- Fortitude does not recover between rounds. If you exit the arena, then the Fortitude of all units is restored to its original level when you first entered.
- You can gain up to 2 additional Flames of Reawakening in the Well of the Mind, allowing you to revive up to 5 times.
- Flames of Reawakening recharge while in the waiting room.
- Ignore the warnings that you are permanently barred from competing if you leave the arena.
- To exit you must speak with Beth, the receptionist, and confirm that you want to leave. You will be Cursed Wheel back to the registration desk. You can exit freely at that point or re-register for your current League.
- League progress is not saved so you will start over at the first round.
- If you need to Cursed Wheel outside your current Abyss, then the Battlefront of Heroes will disappear from the world map.
- If your Cursed Wheel node:
- Puts you in the Royal Capital, then the invitation cutscene will automatically trigger.
- In a different city, the enter the Royal Capital from the world map.
- If it fails to trigger, then enter a different town or dungeon and re-enter the Royal Capital.
- Unfortunately, you will have to go to the Beginning Abyss - BF2 and rewatch the scenes again with the noble.
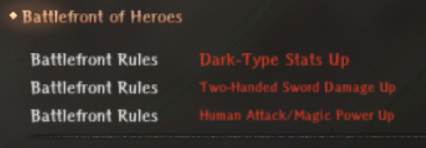
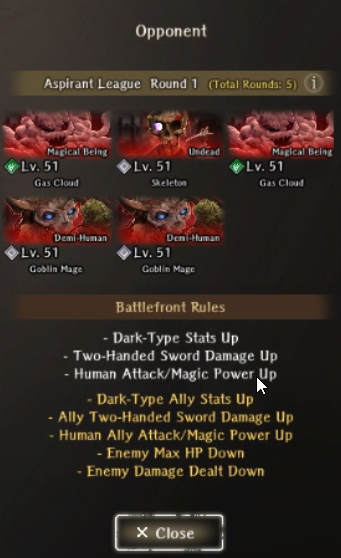
Battlefront Rules
- The arena provides a set of special buffs during combat called "Battlefront Rules" for units that are Dark, Human, or use a 2H Sword.
- Each special buff is significant and scales with each League. It is most impactful and useful for the Elite and Hero Leagues as the lower Leagues can be cleared with just about any team composition.
- We recommend you change MC's Type to Dark in the Well of the Mind. The Type node locations do not change, but the 3 elements are randomly determined each time you reset.
| Requirement | Description | Aspirant | Adept | Elite | Hero |
|---|---|---|---|---|---|
| Dark Type | All stats increased | 1.2x | 1.3x | 1.4x | 1.5x |
| Human | Attack and Magic Power increased | 1.2x | 1.3x | 1.4x | 1.5x |
| 2H Sword | Damage increased | 1.2x | 1.3x | 1.4x | 1.5x |
- We are in the process of verifying whether the special buffs stack and how they interact with other damage passives.
- The scaling factor per buff is the same for each League.
- If you click on a character during battle you can see what buffs and debuffs are currently active.

- The red diamonds represent the number of active special buffs.
- Use of consumable and support items is prohibited.
- The game update states that you cannot leave during a match, but this is not true. You can flee if you need to restart a match.
Lurking Crow Assistance
Under investigation. Behavior varies by League.
- If you are struggling there is a hidden set of Battlefront Rules. They are only available for the first 3 Leagues.
- In the waiting room there is an old man, the Lurking Crow, who will normally ignore you. If you flee a battle and speak with the Blackiron Warden (dwarf) afterward he will suggest you speak with Crow.
- Interact with Crow and you will get a new set of dialogue. For a fee he will offer an additional set of Battlefront Rules that will buff your team and debuff the enemy for the upcoming round. The assistance is only offered on a per round basis. The steps above must be repeated for each battle.
- See next tab for details.
- Goes into effect once the battle starts.
- It can be repeated for each round, but you must flee and repeat the process.
- Once applied, it will continue to be applied to this battle round even if you again flee and re-enter the battle.
- There does not appear to be any negative consequences or limit to the number of times it can be used. (Under Investigation).
- Appears to stack with the standard Battlefront Rules. (Under Investigation).
- The fee cost per League.
- The buff and debuff modifiers (1.x) and whether they scale per League like the standard Battlefront Rules.
- Whether there is a cap on the number of times it can be used on the Adept and Elite Leagues.
- Whether it is available on the Hero League under certain circumstances.
- Afer fleeing, if you try to re-enter the arena, the Blackiron Warden will say you arent ready and should go talk to the Lurking Crow.
- Note you must speak with the Blackiron Warden first, otherwise Crow will not offer you the buff.
- Talk Crow and select "I want to win". Pay the 2,000 gp fee.
- If you pay the fee, when you re-enter the arena the new Crow buffs will take effect right after the battle starts.
- After winning the battle, the crow resets to ignoring you again.
- You can repeat this for every battle. There appear to be no negative consequences.
- Crow fee: 10,000 gp
- Information pending.
- Crow fee: 50,000 gp
- Assistance appears to be unavailable. After fleeing from a battle and speaking with the Lurking Crow he will say, "This battle is yours and yours alone to suffer through."
- Unclear if there is any way to get additional Hero League assistance, or if this will be adjusted during the season.
Hero's Sigil: Dark
- Warning! The medal is a one-time reward after completing all rounds in a League. Each League clear gives an additional level up to L4. It cannot be farmed or reassigned to a different unit.
- The medal gives a passive, Hero's Sigil: Dark, that reduces Dark-type damage along with a small boost to HP, MP, and SP. The bonuses for Dark units are doubled.
- All members in your Battlefront roster receive the medal even if they do not participate. We recommend you think carefully about what units you want to prioritize before beginning.
- It can be viewed on a unit's Stats page under Passive Skills.
- Drecom has stated that they will provide alternative methods for increasing the passive's level in a future update.
- Future seasons will offer additional medals, but only one can be equipped at a time.
- Each time you clear a League your entire Battlefront roster recieves 100 EXP (or 1 Level) toward the passive skill.
- The roster expands by +4 each League. New members can receive the medal, but at a lower max level.
| Stat | L1 | L2 | L3 | L4 | Totals |
|---|---|---|---|---|---|
| HP | 5 (10) | 5 (10) | 10 (20) | ||
| MP | 5 (10) | 5 (10) | |||
| SP | 5 (10) | 5 (10) |
- Dark units receive a 2x bonus to each stat. Those values are listed as (#).
- It is unknown if the Dark-type damage reduction increases with each level.
| League Name | Aspirant | Adept | Elite | Hero | Max Level | Max # of Units |
|---|---|---|---|---|---|---|
| Aspirant | +1 | +1 | +1 | +1 | 4 | 8 |
| Adept | +1 | +1 | +1 | 3 | 4 | |
| Elite | +1 | +1 | 2 | 4 | ||
| Hero | +1 | 1 | 4 |
Unit selection can be complicated, but here are some things to consider:
- Prioritize your core, long-term units for the incremental stat bonuses and Dark damage reduction.
- Maximize the 2x stat bonus for Dark units.
- Dark Knights gain +10 SP at L3, which is extremely helpful due to their low SP pools even with high Discipline levels.
- Improve the survivability of Light units by giving them at least L1 of the medal. Dark bosses and super bosses are very common.
Hero's Reward Missions
Basics
Summary
- It requires a total of 6,500 point to clear the Hero's Reward Mission.
- There is a maximum of 9,120 total points from all sources. It is possible to clear the entire Mission set before even leaving Aspirant League.
- Excluding the Hero League, you have a 1,820 point buffer in case you are unable to complete certain achievements or miss points from the Weekly achievements.
- Mission achievements, progress, and rewards can only be accessed while in the arena.
- Many mission achievements that don't specify winning can be completed even if you flee or lose the battles.
Points by Category
| League Name | Rounds | Clear | Total | Cumulative |
|---|---|---|---|---|
| Sign-up | 100 | 100 | ||
| Aspirant | 400 | 200 | 600 | 700 |
| Adept | 400 | 200 | 600 | 1,300 |
| Elite | 400 | 200 | 600 | 1,900 |
| Hero | 400 | 200 | 600 | 2,500 |
| Hero - No Deaths | 200 | 2,700 |
- The round achievements are worth 100 points. Clearing a League is worth 200 points.
- Clearing everything through Elite gives you 1,900 points.
- If you do not progress through the Hero League, then you will need 4,600 points to reach the 6,500 points for all Mission rewards.
| Requirement | 1 | 2 | 3 | 4 | 5 | Total |
|---|---|---|---|---|---|---|
| Dark-type | 100 | 100 | 100 | 100 | 200 | 600 |
| Human | 100 | 100 | 100 | 100 | 200 | 600 |
| 2H Swords | 100 | 100 | 100 | 100 | 200 | 600 |
| Knight | 100 | 100 | 100 | 300 | ||
| Mage | 100 | 100 | 100 | 300 | ||
| --- | --- | --- | --- | --- | --- | |
| Total | 500 | 500 | 500 | 300 | 600 | 2,400 |
- These achievements refer to the "Win using at least X adventurers". The number of required members are the column headings (1-5).
- MC does not count toward the Dark units achievement.
- The Special achievements are worth a total of 2,400 points. If you cannot make progress on the Hero League this will be one of your primary sources for reaching 6,500 points for all Mission rewards.
| Damage Required | Total | Cumulative |
|---|---|---|
| 200 | 100 | 100 |
| 400 | 100 | 200 |
| 600 | 100 | 300 |
| 900 | 100 | 400 |
| 1,500 | 100 | 500 |
| 1,800 | 100 | 600 |
| 2,200 | 100 | 700 |
| 2,600 | 100 | 800 |
| 3,000 | 100 | 900 |
| 5,000 | 100 | 1,000 |
| 7,000 | 100 | 1,100 |
| 10,000 | 100 | 1,200 |
- Each achievement is worth 100 points for a total of 1,200 points.
- Multi-hit weapons and attacks such as Hue count as "one-hit".
- Even if you flee or lose, the damage done in a round is still counted.
- Strongly recommend doing the 10,000 damage achievement on a lower League. Have the Lurking Crow buff active, sleep or freeze a weak enemy, and hit them with your strongest skill using a Dark Human equipped with a 2H sword.
| Damage Required | Total | Cumulative |
|---|---|---|
| 3,000 | 100 | 100 |
| 6,000 | 100 | 200 |
| 9,000 | 100 | 300 |
| 30,000 | 100 | 400 |
| 60,000 | 100 | 500 |
| 90,000 | 100 | 600 |
| 120,000 | 100 | 700 |
| 160,000 | 100 | 800 |
| 200,000 | 100 | 900 |
| 300,000 | 100 | 1,000 |
| 600,000 | 100 | 1,100 |
| 900,000 | 100 | 1,200 |
- Each achievement is worth 100 points for a total of 1,200 points.
- Even if you flee or lose, the damage done in a round is still counted.
- Strongly recommend farming the total damage achievements in the Aspirant and Adept Leagues depending on your Abyss progress and account power. Stacking high power attacks like you would use for the One-Hit missions will accumulate total damage quickly.
| Requirement | Total | Cumulative |
|---|---|---|
| Defeat 5 monsters | 30 | 30 |
| Defeat 10 monsters | 30 | 60 |
| Defeat 20 monsters | 30 | 90 |
| Deal a total of 5,000 damage | 30 | 120 |
| Deal a total of 10,000 damage | 30 | 150 |
| Deal a total of 20,000 damage | 30 | 180 |
- There are 8-9 weekly missions during the season (depending on how partial weeks are handled. Following calculations will assume 9).
- Each achievement is worth 30 points for a total of 180 points per week (Total: 1,620 points over 9 weeks).
- Note: We do not know if the requirements will change week-to-week or if these will stay constant.
| Major Achievement Category | Total |
|---|---|
| From League: | |
| Registration | 100 |
| Aspirant | 600 |
| Adept | 600 |
| Elite | 600 |
| Hero | 600 |
| Hero - No Deaths | 200 |
| Special | 2,400 |
| Damage: One-Hit | 1,200 |
| Damage: Total | 1,200 |
| Weekly | 1,620 |
| ----- | |
| Grand Total | 9,420 |
- There are a total of 9,120 points available. Reduce that number by 800 if Hero is unclearable for you and the net result is 8,320.
- That leaves a buffer of 1,820 points (8,320 - 6,500), giving quite some flexibility on what achievements you can ignore and/or be unable to fulfill if you're stuck in a high-difficulty League.
- Note:
- 6,560 points can be earned by Registering, completing all Special, Damage: One-Hit, Damage: Total, and 7 Weekly Missions, and only beating the first Aspirant battle.
- So even if the event cannot be completed, all Event rewards except the Hero's Sigil are achievable by anyone eligible to enter the Arena.
Arena Rewards
- Complete Mission achievements to earn points to unlock rewards. Rewards are granted every 100 points.
- Note that not all rewards can be obtained by F2P players.
Notable Items
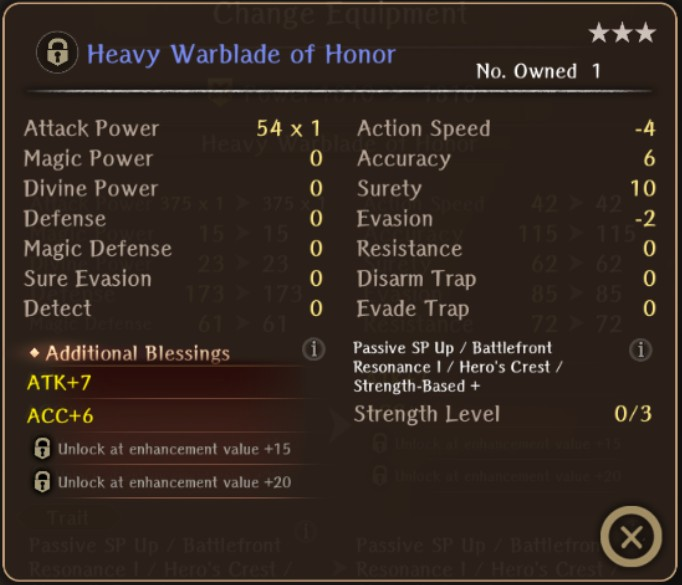
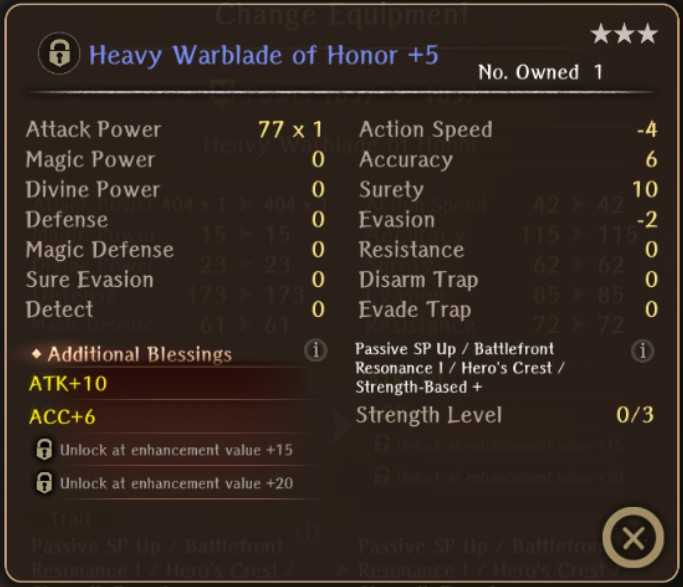
- The weapon will always roll ATK and ACC on the first and second line, respectively.
- The value is RNG, but can range from +5-7.
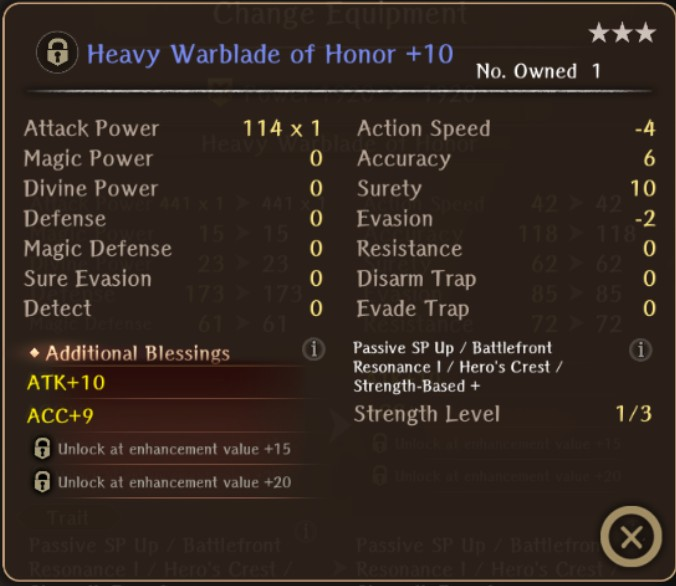
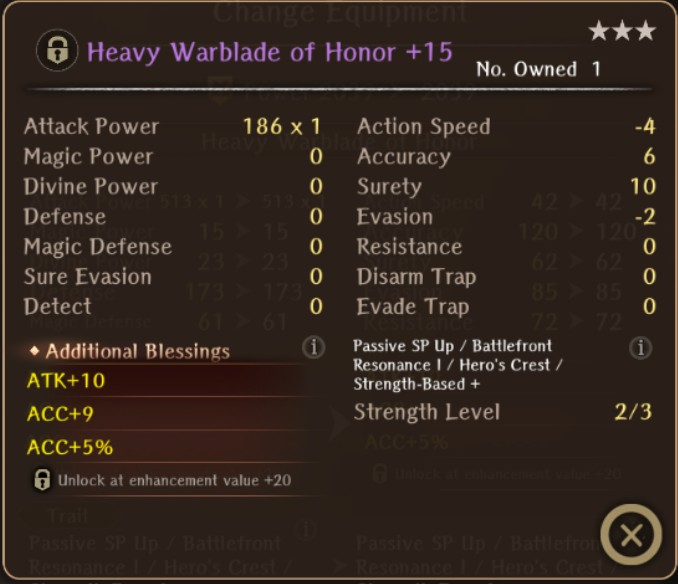
- Overall, a useful Ebon-tier 2H Sword if you are still progressing in A3 or below. For A4 players it can reach 240 ATK at +10 with Composite Reinforcement and it has the best inherent stats (Accuracy, Surety, SP) outside Devourer of Ruin, Gillion's gacha weapon.
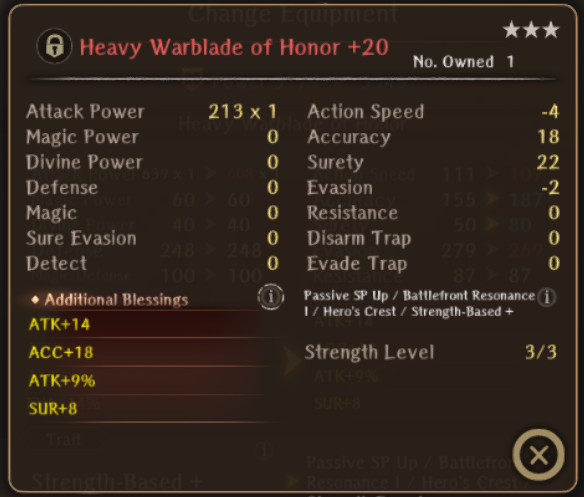
- Drecom has decided to lock the remaining 18 unification material behind the paid pass, which is where the ATK "boost" comes from at +16.
- It gives +6 Accuracy and +10 SUR at +15, which is effectively an additional Blessing slot. However, at +20 it jumps to +18 Accuracy and +22 SUR, which might make it attractive for some end game players. Note that the STR-modifier for Ebon-tier is 2.0x versus 2.1x for Silver-tier.
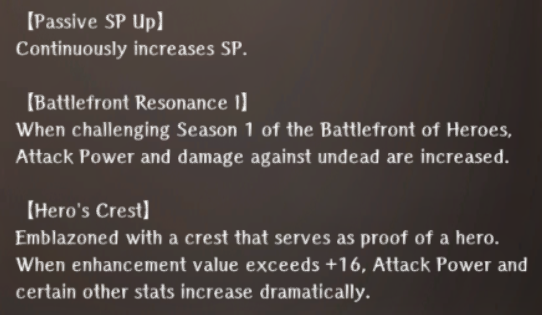
- The extra +6 SP is nice, but like all weapons with "Passive SP Up" it does not scale with enhancement.
- The extra damage against Undead enemies is marginally helpful, but the most dangerous enemies especially in the Elite and Hero Leagues are other races.
- First time that Drecom has released an item that gives Mastery (Discipline) experience. Each one gives 25 Mastery.
- As noted F2P will only be able to get 3 copies (75 Mastery) unless you can clear the Hero League. The paid pass provides 2 additional ones for a total of 5.
- Recommended uses:
- Limited banner unit that you want to invest in long-term. Future seasons are likely to provide additional copies.
- Alternative style unit to reach D1 for Shared Discipline. This can help avoid having to pity (100 pulls) an extra copy and save your green gems for other banners.
| Requirement | # |
|---|---|
| Clear the Aspirant League | 1 |
| Clear the Adept League | 1 |
| Clear the Elite League | 1 |
| Clear the Hero League | 1 |
| F2P Total | 4 |
| Paid Pass Only: | |
| Awarded at 1,500 Points | 1 |
| Awarded at 3,000 Points | 1 |
| Paid Pass Total | 6 |
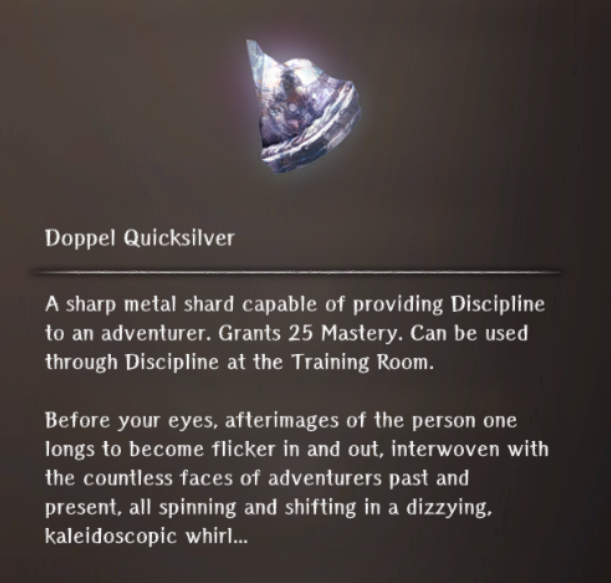
- When you go to the Training Room - Discipline with a unit you will now see the Doppel Quicksilver as an available option.
Rewards List
- The Reward Lists are organized into F2P and Paid Pass columns.
- Without the paid pass you will only receive enough unification material (x9) to take the Heavy Warblade of Honor to +15.
- Since the Hero League is effectively impossible to clear it means most players will only receive 3x Doppel Quicksilvers or 75 Mastery (Discipline) experience. Paid pass members receive 2 extra at 1,500 and 3,000 points, respectively.
- Rewards are given automatically after the achievement has been submitted as complete.
| Category | Description |
|---|---|
| Doppel Quicksilver | 4x (The 4th is locked behind clearing Hero League) |
| Heavy Warblade of Honor (HwOH) | 1x Ebonsteel, 2H Sword with unique traits |
| HWoH Unification Material | 9x (Enhance up to +15. |
| Gold | 600,000 |
| Gems of Org | 200 |
| Bones | 1x Gandolfo, 2x Adventurer Remains I, 2x Adventurer Remains II |
| Iron Ore | 30x Low, 30x Mid, 30x High, 5x Fine, 3x Silver |
| Skill Scrolls | 1x Zelos, 1x Mazelos, 1x Earth-Splitting Strike, 1x Codex of Learning (25 EXP) |
| Guild Tags | 6x Ungraded Tags |
| Alteration Stones | 2x Lesser Full Alteration Stones |
| Total Points Required | F2P Reward | Mission Pass Reward |
|---|---|---|
| 100 | Savage Warrior Remains (Gandolfo) | 100x Gems of Org |
| 200 | Heavy Warblade of Honor (HWoH) | 50x Gems of Org |
| 1,000 | Zelos Skill Scroll | 100x Gems of Org |
| 1,500 | 1x Ungraded Guild Tag | 1x Doppel Quicksilver |
| 1,600 | 100x Gems of Org | 100x Gems of Org |
| 1,700 | 1x HWoH Unification Material | 50x Gems of Org |
| 2,500 | 1x HWoH Unification Material | 100x Gems of Org |
| 3,100 | 1x Adventurer Remains I | 1x Adventurer Remains I |
| 3,200 | 3x HWoH Unification Material | 9x HWoH Unification Material |
| 3,800 | Mazelos Skill Scroll | 100x Gems of Org |
| 4,000 | Full Power Strike Skill Scroll | 2x Ungraded Guild Tag |
| 4,600 | 1x Adventurer Remains II | 1x Adventurer Remains II |
| 4,700 | 3x HWH Unification Material | 9x HWH Unification Material |
| 5,300 | 1x Codex of Learning | 200x Gems of Org |
| 5,400 | 1x Silver Ore | 1x Silver Ore |
| 5,500 | 1x Lesser Full Alteration Stone | 1x Lesser Full Alteration Stone |
| 5,600 | 1x Adventurer Remains I | 1x Adventurer Remains I |
| 6,000 | 1x Adventurer Remains I | 1x Adventurer Remains I |
| 6,100 | Earth-Splitting Strike Skill Scroll | 1x Ungraded Guild Tag |
| 6,400 | 2x Silver Ore | 2x Silver Ore |
| 6,500 | 1x Lesser Full Alteration Stone | 1x Full Alteration Stone |
| Total Points Required | F2P Reward | Mission Pass Reward |
|---|---|---|
| 100 | Savage Warrior Remains (Gandolfo) | 100x Gems of Org |
| 200 | Heavy Warblade of Honor (HWoH) | 50x Gems of Org |
| 300 | 2x Clock Time of Maneuver (36,480xp) | 50x Gems of Org |
| 400 | 25,000gp | 100x Gems of Org |
| 500 | 10x Low Grade Ore | 50x Gems of Org |
| 600 | 2x Clock Time of Maneuver (36,480xp) | 50x Gems of Org |
| 700 | 25,000gp | 100x Gems of Org |
| 800 | 10x Low Grade Ore | 50x Gems of Org |
| 900 | 2x Clock Time of Maneuver (36,480xp) | 50x Gems of Org |
| 1,000 | Zelos Skill Scroll | 100x Gems of Org |
| 1,100 | 25,000gp | 50x Gems of Org |
| 1,200 | 2x Clock Time of Maneuver (36,480xp) | 50x Gems of Org |
| 1,300 | 10x Low Grade Ore | 100x Gems of Org |
| 1,400 | 25,000gp | 100x Gems of Org |
| 1,500 | 1x Ungraded Guild Tag | 1 Doppel Quicksilver |
| 1,600 | 100x Gems of Org | 100x Gems of Org |
| 1,700 | 1x HWoH Unification Material | 50x Gems of Org |
| 1,800 | 4x Clock Time of Maneuver (36,480xp) | 50x Gems of Org |
| 1,900 | 40,000gp | 100x Gems of Org |
| 2,000 | 10x Mid Grade Ore | 50x Gems of Org |
| 2,100 | 4x Clock Time of Maneuver (36,480xp) | 50x Gems of Org |
| 2,200 | 100x Gems of Org | 100x Gems of Org |
| 2,300 | 10x Mid Grade Ore | 50x Gems of Org |
| 2,400 | 4x Clock Time of Maneuver (36,480xp) | 50x Gems of Org |
| 2,500 | 1x HWoH Unification Material | 100x Gems of Org |
| 2,600 | 40,000gp | 50x Gems of Org |
| 2,700 | 4x Clock Time of Maneuver (36,480xp) | 50x Gems of Org |
| 2,800 | 10x Mid Grade Ore | 100x Gems of Org |
| 2,900 | 40,000gp | 100x Gems of Org |
| 3,000 | 1x Ungraded Guild Tag | 1 Doppel Quicksilver |
| 3,100 | 1x Adventurer Remains I | 1x Adventurer Remains I |
| 3,200 | 3x HWoH Unification Material | 9x HWoH Unification Material |
| 3,300 | 5x Clock Time of Maneuver (36,480xp) | 100x Gems of Org |
| 3,400 | 50,000gp | 25,000gp |
| 3,500 | 10x High Grade Ore | 15x Mid Grade Ore |
| 3,600 | 5x Clock Time of Maneuver (36,480xp) | 100x Gems of Org |
| 3,700 | 50,000gp | 25,000gp |
| 3,800 | Mazelos Skill Scroll | 100x Gems of Org |
| 3,900 | 5x Clock Time of Maneuver (36,480xp) | 100x Gems of Org |
| 4,000 | Full Power Strike Skill Scroll | 2x Ungraded Guild Tag |
| 4,100 | 50,000gp | 25,000gp |
| 4,200 | 5x Clock Time of Maneuver (36,480xp) | 100x Gems of Org |
| 4,300 | 10x High Grade Ore | 5x High Grade Ore |
| 4,400 | 50,000gp | 25,000gp |
| 4,500 | 2x Ungraded Guild Tag | 2x Ungraded Guild Tag |
| 4,600 | 1x Adventurer Remains II | 1x Adventurer Remains II |
| 4,700 | 3x HWH Unification Material | 9x HWH Unification Material |
| 4,800 | 60,000gp | 30,000gp |
| 4,900 | 10x Clock Time of Maneuver (36,480xp) | 200x Gems of Org |
| 5,000 | 10x High Grade Ore | 10x High Grade Ore |
| 5,100 | 5x Fine Grade Ore | 5x Fine Grade Ore |
| 5,200 | 60,000gp | 30,000gp |
| 5,300 | 1x Codex of Learning (25xp) | 200x Gems of Org |
| 5,400 | 1x Silver Ore | 1x Silver Ore |
| 5,500 | 1x Lesser Full Alteration Stone | 1x Lesser Full Alteration Stone |
| 5,600 | 1x Adventurer Remains I | 1x Adventurer Remains I |
| 5,700 | 10x Clock Time of Maneuver (36,480xp) | 5x Clock Time of Maneuver (36,480xp) |
| 5,800 | 60,000gp | 30,000gp |
| 5,900 | 1x Ungraded Guild Tag | 1x Ungraded Guild Tag |
| 6,000 | 1x Adventurer Remains II | 1x Adventurer Remains II |
| 6,100 | Earth-Splitting Strike Skill Scroll | 1x Ungraded Guild Tag |
| 6,200 | 60,000gp | 30,000gp |
| 6,300 | 1x Ungraded Guild Tag | 1x Ungraded Guild Tag |
| 6,400 | 2x Silver Ore | 2x Silver Ore |
| 6,500 | 1x Lesser Full Alteration Stone | 1x Full Alteration Stone |
League Battles
Aspirant League
- Frontline: Air Cloud 2x, Skeleton 1x
- Backline: Goblin Mage 2x
- The easiest fight to set up high damage attacks to clear all single-hit damage missions, even for lower level players. For maximum damage, use a 2H sword with a Dark element Human. For even more, flee from the battle and get the Lurking Crow for double buffs, then proceed. The Goblin Mages are susceptible to MONTINO and KATINO. So MONTINO them to start, clear the front line, take whatever time you need to stack all the ATK buffs/ DEF-down debuffs you have, KATINO them for double damage, and take your biggest swings. If you low roll, miss Surety, etc, just reset and try again. Additionally, you can save one enemy, flee from the battle after doing max damage, then re-enter the fight and repeat. If you're patient you can even clear the total and weekly damage missions just spamming this one fight with max damage tactics.
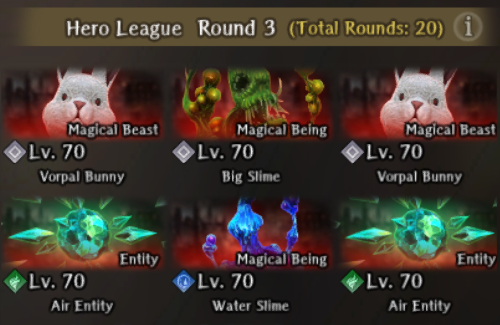
- Frontline: Vorpal Bunny 2x
- Backline: Skeleton Archer 3x
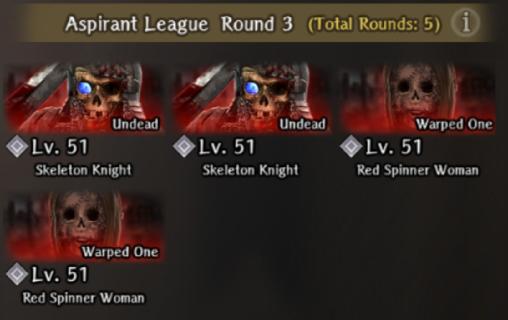
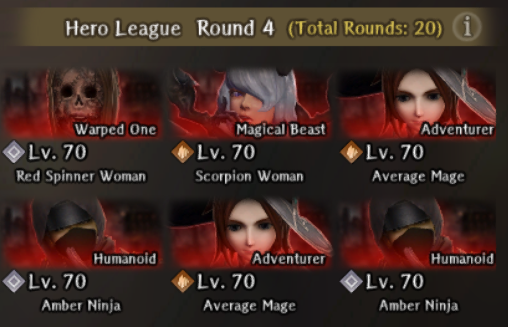
- Frontline: Skeleton Knight 2x
- Backline: Red Spinner Woman 2x
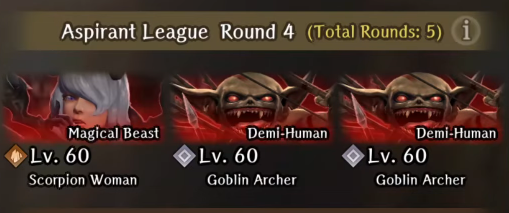
- Frontline: Scorpion Lady 1x, Goblin Archer 1x
- Backline: Goblin Archer 1x
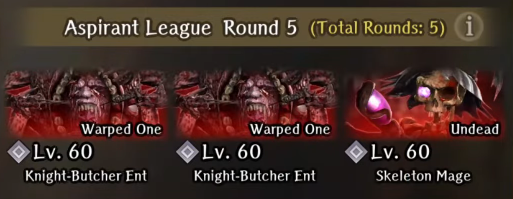
- Frontline: Knight-Butcher Ent 2x
- Backline: Skeleton Mage 1x
Adept League

- Frontline: Earth Hobgoblin 2x
- Backline: Earth Creeping Coin 2x
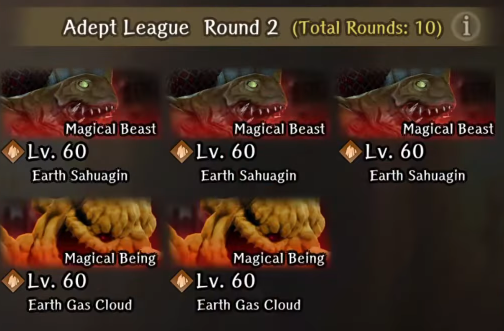
- Frontline: Earth Sahuagin 3x
- Backline: Earth Cloud 2x
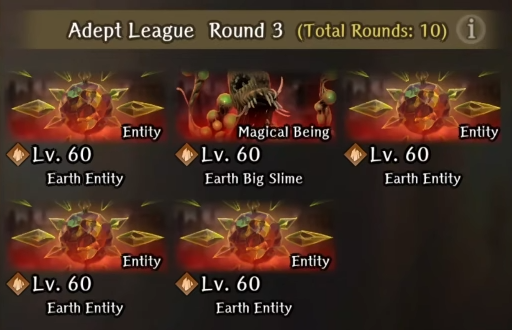
- Frontline: Earth Big Slime 1x
- Backline: Earth Entity 4x
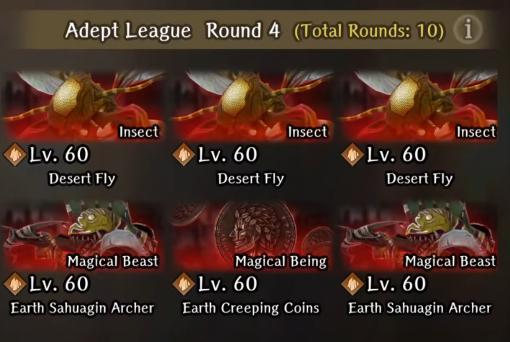
- Frontline: Desert Fly 3x
- Backline: Earth Sahuagin Archer 2x, Earth Creeping Coin 1x
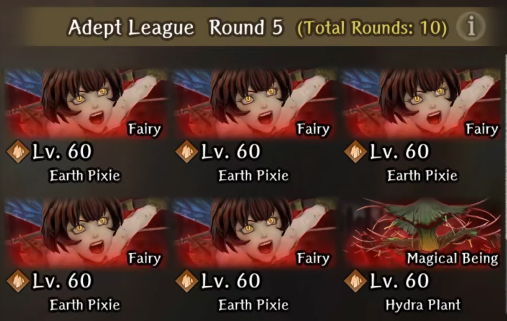
- Frontline: Earth Pixie 4x
- Backline: Earth Pixie 1x, Hydra Plant 1x
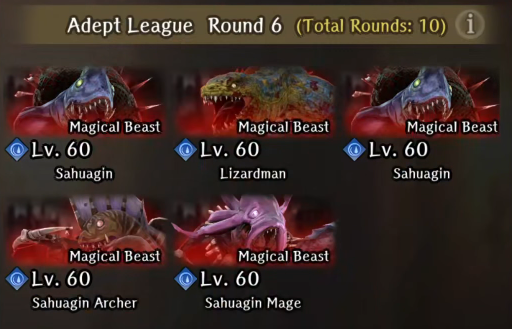
- Frontline: Water Sahuagin 2x, Water Lizardman 1x
- Backline: Sahuagin Archer 1x, Sahuagin Mage 1x
- Frontline: Scorpion Lady 1x
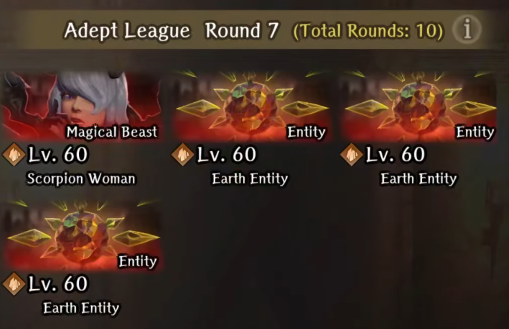
- Backline: Earth Entity 3x
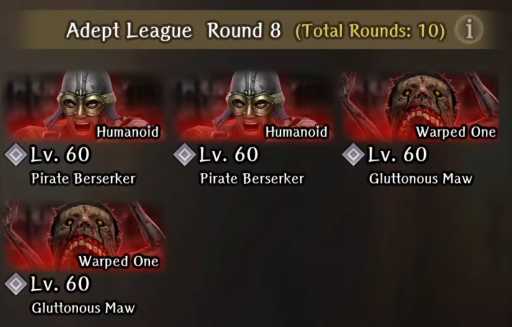
- Frontline: Pirate Berserker 2x
- Backline: Gluttonous Maw 2x
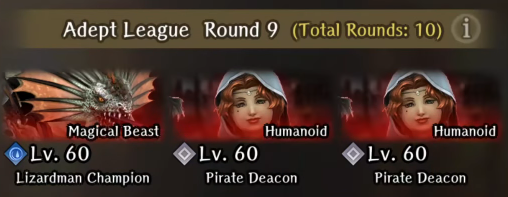
- Frontline: Water Lizardman Champion
- Backline: Pirate Deacon 2x
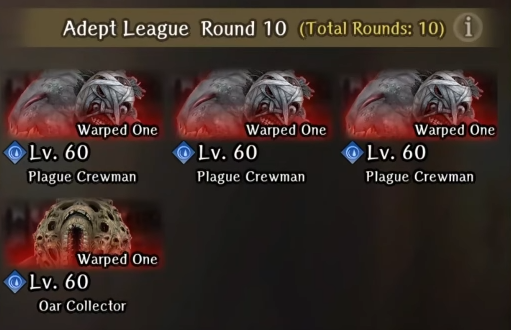
- Frontline: Plague Crewman 3x
- Backline: Oar Collector 1x
Elite League

- Frontline: Skeleton Archer 2x
- Backline: Poltergeist 2x
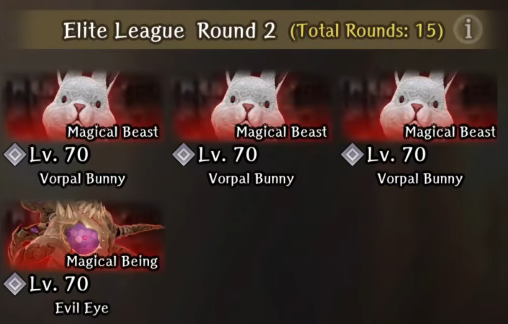
- Frontline: Vorpal Bunny 3x
- Backline: Evil Eye 1x
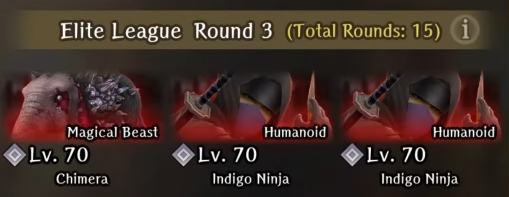
- Frontline: Chimera 1x
- Backline: Indigo Ninja 2x
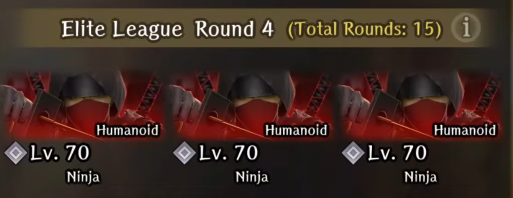
- Frontline: Ninja 3x
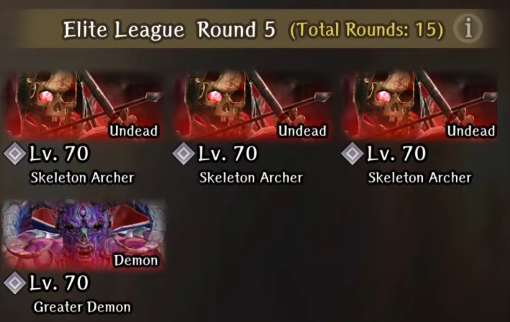
- Frontline: Greater Demon 1x
- Backline: Skeleton Archer 3x
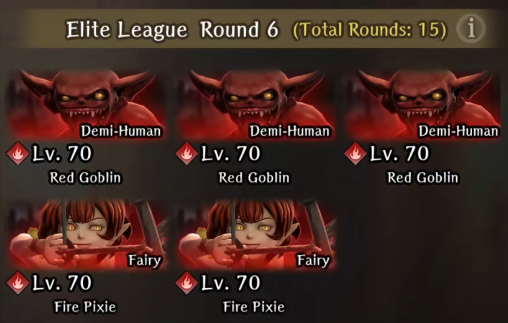
- Frontline: Fire Goblin 3x
- Backline: Fire Pixie 2x
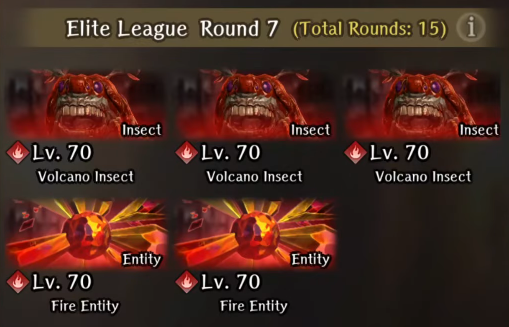
- Frontline: Fire Insect 3x
- Backline: Fire Entity 2x
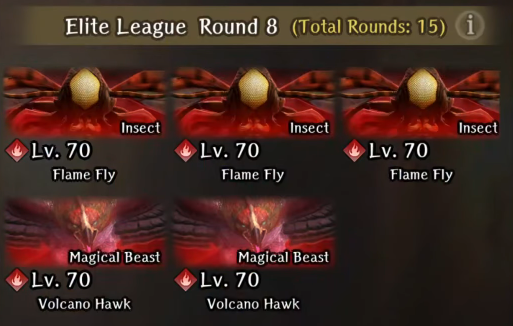
- Frontline: Fire Fly 3x
- Backline: Fire Hawk 2x
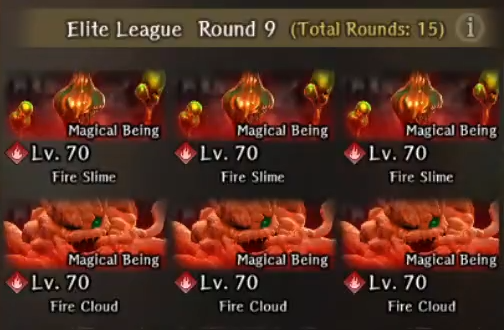
- Frontline: Fire Slime 3x
- Middle: Fire Cloud 3x
- Backline: 2x Fire Goblin Archer, 1x Fire Goblin Mage
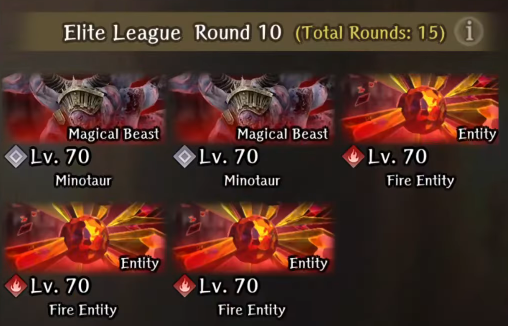
- Frontline: Minotaur 2x
- Backline: Fire Entity 3x
- Debuff Applied: Beastfolk Stats Down
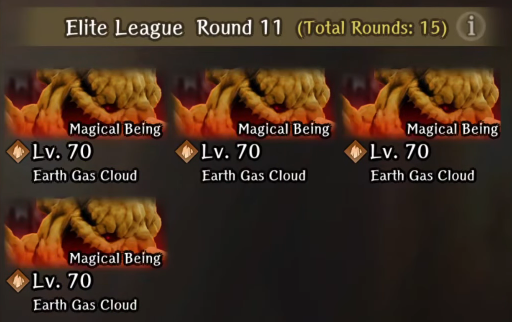
- Frontline: Earth Cloud 4x
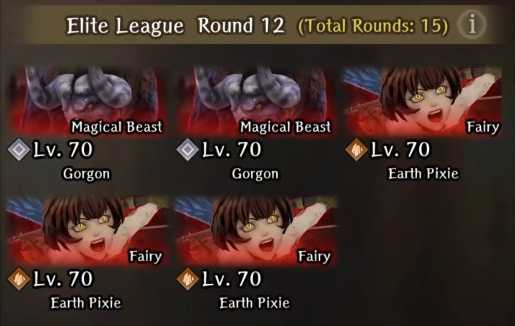
- Frontline: Gorgon 2x
- Backline: Earth Pixie 3x
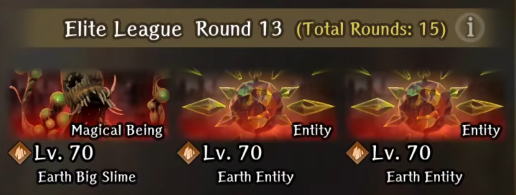
- Frontline: Earth Big Slime 1x
- Backline: Earth Entity 2x
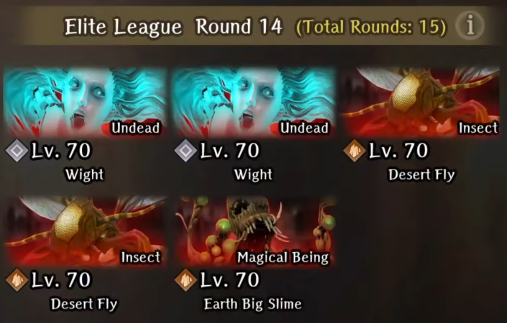
- Frontline: Wight 2x
- Backline: Desert Fly 2x, Earth Big Slime 1x
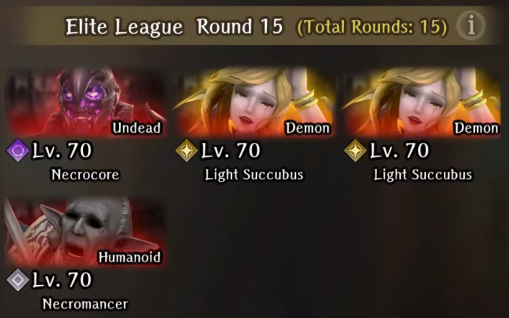
- Frontline: Light Succubi 2x, Necrocore 1x
- Backline: Necromancer 1x
- Debuff Applied: Elf Stats Down
Hero League
This content is extremely difficult. It's essentially mandatory to have many dark element units invested to some degree to even attempt a run. In addition, it's essential for the player to have multiple sets of EVA gear, Ninja weapons, and 2H weapons for this. Dark Element frontline should have an recommended minimum requirement of ~180 EVA, ~750 2H ATK or ~350x3 1H ATK, and ~650-700 HP to tackle this. However, more EVA is extremely recommended if possible, especially with evasive classes like thieves and ninjas, or specific cases like highly disciplined Savias. It's also highly recommended to bring many priests AND mages with healing capabilities, with their own set of EVA and/or ASPD gear.
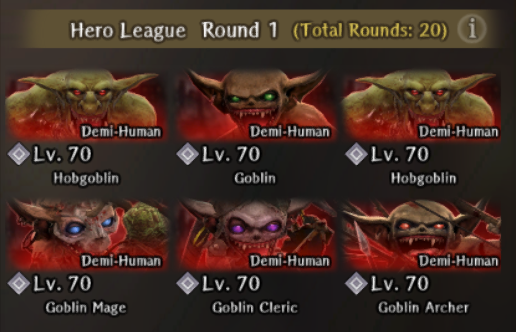
- Frontline: Hobgoblin 2x, Goblin 1x
- Backline: Goblin Mage 1x, Goblin Shaman 1x, Goblin Archer 1x
- Goblins have around 5k HP each. Hobgoblins have similar amounts of HP.
- All the enemies use their standard skillsets. All of them are evadable with Dark Element units with 180+ EVA + MASOLOTU 1.
- Kill the magic casting backline units first. Kill the rest with basic attacks to conserve SP.
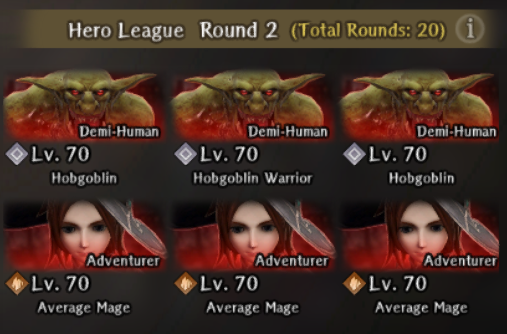
- Frontline: Hobgoblin 3x
- Backline: Mage Adventurer 3x
- There is referee intervention at the start of the match, which gives all of the enemies an ATK up buff.
- Mage Adventurers have around 7k HP each. They can be critted. They take 3 DALTOs to freeze.
- The middle Hobgoblin has around 16-18k HP and high defense (need 2h or defense penetration weapons). The side ones have around 5k HP.
- Mage Adventurers tend to prioritze casting BALAFEOS first on any rows without ATK debuff. They also prefer casting other debuff spells, but can cast extremely high damage MIGAL (800ish). The BALAFEOS is quite strong so ABIT it ASAP on ATK-scaling units. It seems like they can be outsped if a unit has over 190-200 ASPD.
- Hobgoblins use their standard skillset. Can be evaded with Dark Element units with 180+ EVA.
- Kill the mages first ASAP. Kill the rest with basic attacks to conserve SP.
- Frontline: Vorpal Bunny 2x, Large Slime 1x
- Middle: Wind Entity 2x, Water Slime 2x
- Backline: Ninja 2x
- Bunnies have around 5k HP. They have extremely high evasion, but can be slept very easily. It's not recommended to freeze them.
- Ninjas have around 5k HP. They tend to cast low accuracy row status effects or low damage row magic. They can be evaded otherwise. They also can be critted. They take 3 DALTOs to freeze.
- The Big Slime has around 8k HP. The water slimes have around 6-7k HP. The Big Slime and Water Slimes can be evaded, but the water slimes can be somewhat accurate. The water slimes can be critted.
- The Entities have around 5.5k HP. They can be evaded if they are not casting magic with the previously mentioned stats.
- It's recommended to kill in the order of Bunnies, Ninjas, Entities, and Slimes.
- Frontline: Red Spinner Woman 1x, Scorpion Lady 1x
- Backline: Mage Adventurer 2x, Ninja 2x
- The Red Spinner Woman has around 13-14k HP. Has very high accuracy. Can be crit.
- The Mages have around 7k HP each, ninjas have 5k each like previous rounds.
- The Scorpion Lady has around 40-42k HP. Has very high accuracy.
- It's recommended to clear the backline first. See previous entries for how these enemies function. They will be consistent throughout the run.
- It's possible to evade the Red Spinner Woman and Scorpion Lady but they might require MASOLOTU + DILTO applied as they are a bit more accurate. BATILGREF also helps buy a lot of time to kill the backline first before dealing with the frontline.
- It's recommended to kill in the order of Mage, Ninja, Red Spinner Woman, Scorpion Lady.
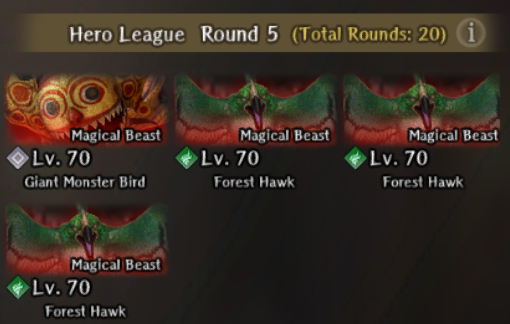
- Frontline: Giant Monster Bird 1x
- Backline: Air Hawk 3x
- Giant Monster Bird has around 110k HP. It is very vulnerable to chill, and freezes in two DALTOs. Iarumas can also instantly freeze it if equipped with a Snow Oni Yoto and casting DALTO.
- Air Hawks have around 6k HP each. They do massive amounts of single target damage, but can be evaded. They can be crit.
- This is probably one of the more annoying fights for a majority of the runs, as it can drain a lot of resources. It's recommended to deal with the Hawks immediately by using KATINO, which is nearly guaranteed on them. If they are not taken care of they can easily surety for over 1K damage. Otherwise, they have rather low HP and can be killed with ESS or Poised after being slept despite being in the backline.
- The Monster Bird is very evasive even with the accuracy buff on dark element units, so it's recommended to apply MACALDIA to your DPS and debuff it's evasion via BATILGREF and Chill. Freezing it is the recommended strategy though, as it skips its turn and makes it take more damage. The Monster Bird is immune to the CT debuffing effects of BATILGREF but not the EVA debuffing portion. The single target attack of the Monster Bird is evadable, but all of its AOEs are not. Trample can easily surety and kill a unit (1.2k damage), while its AOEs can deal up to 700-750 damage.
- Knights can be employed here if necessary to survive its full team AOE attack. Alternatively, you can simply equip every unit with Magical Beast Resistance Gear and have two Priests, preferably Dark Element for maximum HP. If your backline is too slow, it's recommended to also equip evasion gear in order to survive the first round of Air Hawk attacks, as well as any single target attacks from the Giant Monster Bird.
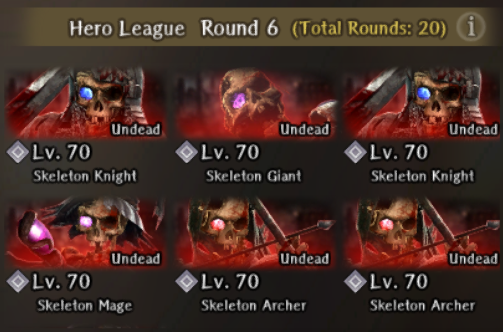
- Frontline: Skeleton Knight 2x, Skeleton Giant
- Backline: Skeleton Mage 2x, Skeleton Archer 2x
- Skeleton Mages have around 2.5k HP. Skeleton Archers have around 3k HP. Skeleton Knights have around 4.5k-5k HP Each. Skeleton Giant has around 10k HP.
- Every enemy has extremely high accuracy, otherwise relatively low HP compared to most fights in this mode. They all have standard movesets, just very high physical damage.
- MAREIN isnt suggested, it's better to BATILGREF the frontline and then focus on wiping the backline ASAP.
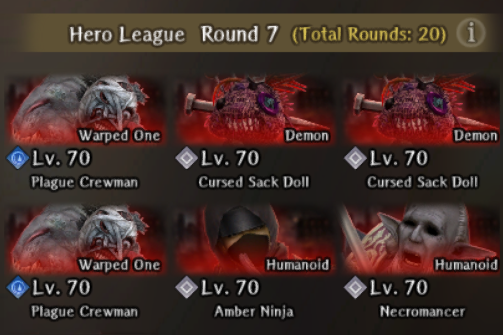
- Frontline: Plague Crewman 2x, Cursed Sack Doll 2x
- Backline: Ninja 2x, Necromancer 1x
- Ninjas have around 5k HP. Can be crit.
- Necromancer has 12.5k-15k HP. Tends to cast Mazelos for 400 damage to a row. Can also cast KANTIOS. Can be crit.
- Plague Crewman have around 30k HP. Basic attack can be evaded. Scurvy Breath does 100-200 damage to row. Can be crit.
- Cursed Sack Dolls have around 10k HP. Freeze instantly but not guaranteed application (high chance though). Sleep not guaranteed and will always wake up immediately on next turn.
- The Cursed Sack Dolls guaranteed go first (even if u have 500 ASPD), and will typically either use Cursed Ritual to apply Curse to everyone or do a lot of damage. They are somewhat hard to evade.
- Everything has a standard moveset, but main issue are the Cursed Sack Dolls. They are extremely fast and evasive, but can be taken care of instantly with MADALTO and ESS/Poised with a 2H Sword. Afterwards it's recommended to kill the Necromancer and Ninjas. You can also KATINO the Plague Crewman, as they are one of the few enemies that can sleep for multiple turns while you take care of the rest. Alternatively, BATILGREF works too.
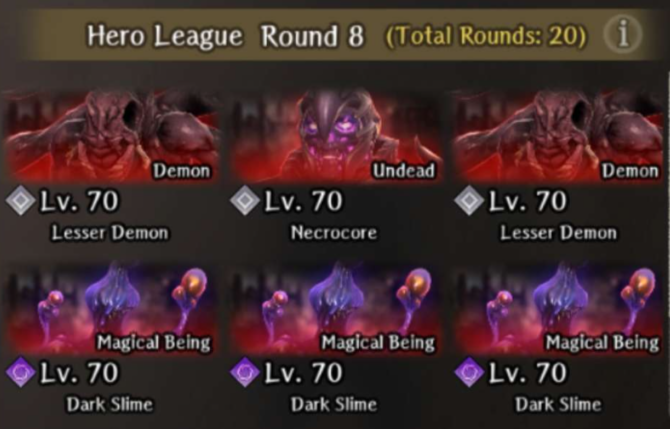
- Frontline: Necrocore 1x, Lesser Demon 2x
- Backline: Dark Slime 4x
- Lesser Demons have ~17.5k HP. Can basic attack or ZELOS for decent damage (400).
- Necrocore has ~28k HP. Can cast ZELOS or MAZELOS for decent damage (400).
- Dark Slimes have ~5k HP. Very low accuracy. Can be crit.
- You can evade all of the enemies here with previously mentioned EVA build. They mainly just use physical attacks.
- Ideally just BATILGREF both rows and kill them with basic attacks to replenish some SP with Debra's inherit skill if possible.
- Focus the front row before killing the backrow.
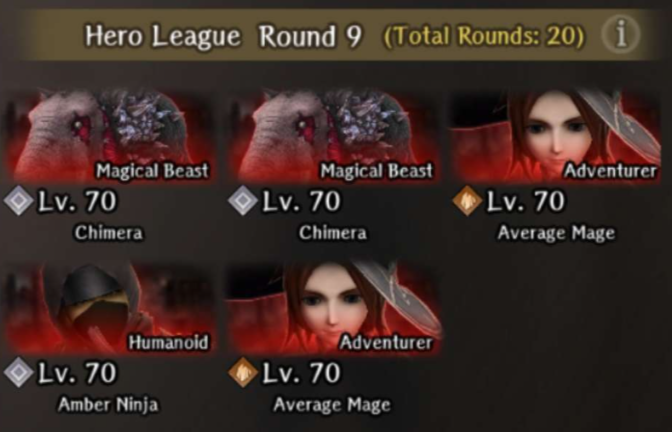
- Frontline: Chimera 2x
- Backline: Ninja 2x, Mage Adventurer 2x
- Ninjas have 5k HP. Mage Adventurers have 7k HP. Same as before.
- Chimeras have around 50k HP each. They are immune to KANTIOS. KATINO rarely lands. They can be evaded with 350 EVA if unbuffed.
- The Chimeras are extremely fast, accurate, and have very high surety chance. You essentially have to pray your damage reduction passives (WOTK, Sanctuary's Blessing, Wisdom of Truth, Eyes that Know the Future) will proc here or they can instantly kill. It's very recommended that your entire frontline has Magical Beast Resist gear. They also can be consistently evaded with 250 EVA + MASOLOTU + chill status. 350-400 EVA may also be enough alone.
- Ideally just BATILGREF the Chimeras and defend with your frontline. Try to kill enemies with your backline. Focus on clearing the enemy backline first, particularly the mages so they don't keep debuffing you.
- All enemies can be Frozen if necessary.

- Frontline: Minotaur 1x, Our Heirlooms 1x
- Backline: Ninja 2x, Mage Adventurer 1x
- Ninjas have 5k HP. Mages have 7k HP. Same as before.
- Minotaur has around 54k HP. All of its attacks can effectively instantly kill everyone (1-1.2k damage without surety). Debris Hurl also effectively does 1k per hit. Can be Frozen in 2 DALTOS or 1 with Snow Oni Yoto Iarumas. However, not guaranteed to apply chill.
- Our Heirlooms has around 80k HP. Does very heavy damage with magic and physical moves (around 800 on everything). The Physical moves however can be easily evaded. Occasionally will cast full team charm or confuse.
- It's recommended to immediately freeze the Minotaur, as it can be frozen with 2 DALTOs. Freezing the Our Heirlooms is also very recommended after dealing with the backline. BATILGREF also helps delay them further.
- The Minotaur has relatively high accuracy, and does very high damage so deal with it first. Very recommended to use Magical Beast Resist gear for your frontline. Can be evaded consistently with enough evasion (e.g. 230 EVA + DILTO + Frozen OR 350+ EVA)
- Our Heirlooms has a standard moveset and isn't that strong. Preferably do not use low fortitude units for this fight though.
- All enemies can be Frozen if necessary.
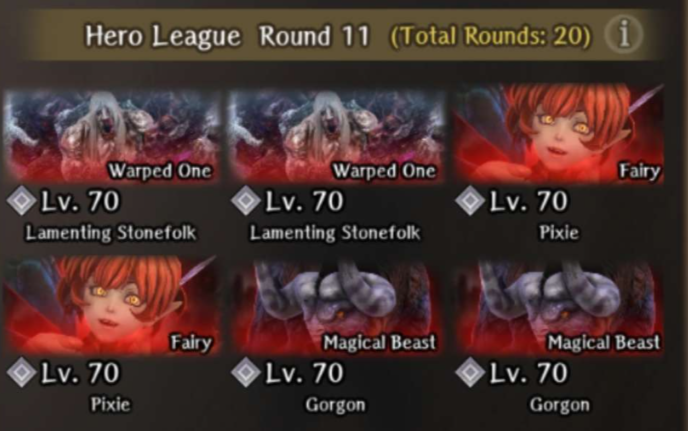
- Frontline: Lamenting Snowfolk 2x
- Middle: Pixie 2x
- Backline: Gorgon 2x
- Lamenting Snowfolk have around 27k HP each. They can cast MAERLIK/ERLIK for 500-600 damage. Their Clamp also does around 500.
- Pixies have around 7.5k HP. They can hit for 500-600 with physical attacks.
- Gorgons have around 21-22k HP. They can be critted. Their Stone Breath generally hits around 400-500. Their Lunge can hit up to 1000.
- MADALTO the pixies immediately and get rid of them, as they can apply Sleep which can easily get you killed.
- It's recommended to BATILGREF both rows and then quickly deal with the columns. If possible, kill the Gorgon before the Lamenting Snowfolk as the Gorgons can instantly stone a row if both aim their breath at the same row. The Gorgons also frequently Lunge, which switches a frontline unit with the backline.
- The Gorgons have very high accuracy and do quite a lot of damage with Lunge as they move closer. It may be favorable to bring Magical Beast Resistance gear.
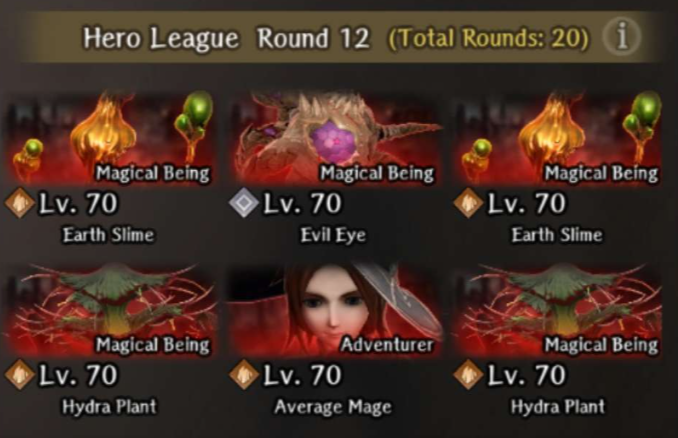
- Frontline: Evil Eye 1x, Earth Slime 2x
- Backline: Hydra Plant 2x, Mage Adventurer 1x
- Mage Adventurers have 7k HP. Can be crit.
- Earth Slimes have around 5-6k HP each. They typically hit for around 700.
- The Evil Eye has around 41-44k HP. Scintillating Laser can easily hit for 1k. It is very resistant to freezing.
- The Hydra Plants have around 20k HP each. They typically hit for around 700-800. Digestive Juices does around 300-400.
- It goes without saying, immediately kill the Mage Adventurer. Then it's preferable to focus on killing the Evil Eye, as it gets two actions a turn, and can potentially wipe an entire row at once. It's somewhat evadable, but very risky if it starts targetting the backline, which may not have very high evasion. In addition, it has a very high chance of calling for an Ally randomly, which is another Evil Eye but with significantly less HP.
- The Hydra Plants have a standard moveset, and don't really do much damage. However, that row damage cannot be evaded.
- The Earth Slimes are evadable and very weak, so they are the least priority to deal with.
- It's preferable to run a lot of damage for this stage to end it quickly.

- Frontline: Big Snow Hawk 2x
- Backline: Snow Hawk 2x, Pixie 2x
- Pixies have around 7.5k HP each. FERU can hit for 700-800.
- Snow Hawks have around 6k HP each.
- Big Snow Hawks have around 19-20k HP. Their Frost Blades can hit for 1000.
- This match is pretty easy, everything can be evaded. MADALTO the backline and immediately kill the pixies. The Snow Hawks however, require 3 DALTOs to freeze.
- Can BATILGREF/MADALTO to reduce their evasion. It's not recommended to use Dissipation or Malefic Wind unless you have plenty of resources remaining to remove their CT/EVA buffs.
- All enemies can be Frozen if necessary.
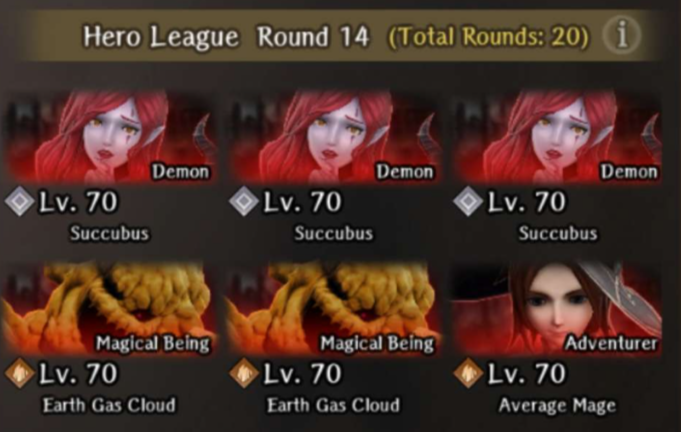
- Frontline: Succubi 3x
- Backline: Earth Cloud 2x, Mage Adventurer 1x
- The Succubi have around 10k HP each.
- The Clouds have around 15-16k HP each.
- Mage Adventurer has 7k HP.
- The clouds have very high defense, especially in the backline and seem to always go first. However, they can generally be evaded. Deal with these last.
- MADALTO the front row, as the Succubi are very evasive but freeze immediately. Kill them and the Mage Adventurer. Then focus on chipping away on the clouds.
- All enemies can be Frozen if necessary.
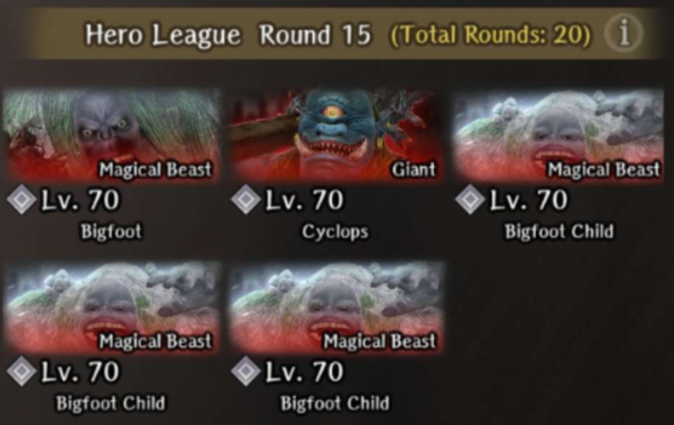
- Frontline: Bigfoot 1x, Cyclops 1x
- Backline: Bigfoot Child 3x
- Debuff Applied: Beastfolk Stats Down
- Referee Intervention happens at the very beginning of the stage. It debuffs everyone's DEF and MDEF for 5 turns, as well as reducing ASPD for 1 turn. It can be resisted.
- Bigfoot has around 30-34k HP. Only really spams its breath move on either row.
- Bigfoot Children have around 17-18k HP each. They have extremely high accuracy. When the Bigfoot dies, they get a permanent ATK and CT debuff. Their damage drops in half.
- Cyclops has around 100k HP. Its basic attacks are evadable, but Wheeling Cleave and Gale Strike are not. They can also surety.
- Majority of the enemies generally cannot be evaded. It's highly recommended to cast BATILGREF and MADALTO on the frontline + backline in order to buy as much time as possible.
- Kill the Bigfoot first, as this will apply an additional CT and ATK down on the Bigfoot children. You can then focus on killing the Cyclops and then the rest of the Bigfoot children.
- It's almost mandatory to run a large amount of Stun/Paralysis Tolerance for this as the breath from the Bigfoot can easily end the run. It's recommended to bring Asha and Eldorado for this if possible, as they can both also help apply MADALTO.
- All enemies can be Frozen if necessary.
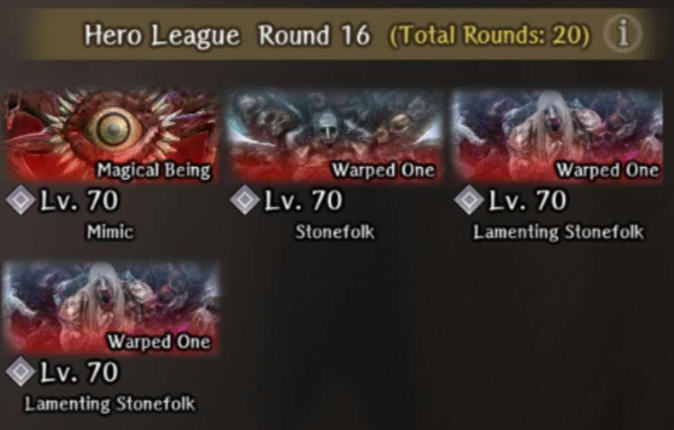
- Frontline: Mimic 1x, Stonefolk 1x
- Backline: Lamenting Snowfolk 2x
- You can farm this floor for SP if you keep killing the Stonefolk with a Debra inherited skill unit and fleeing.
- The Stonefolk has around 5k HP, but has very high defenses. It hits very hard, but typically dies very quickly.
- The Mimic has around 81-82k HP. It moves twice a turn and has a standard moveset. It can easily hit for 900+ per physical attack.
- The Lamenting Snowfolk have around 30k HP each. They have a standard moveset. Its ERLIK can easily hit for 800+. They freeze instantly.
- The Stonefolk typically just uses physical attack, and it has insanely high damage, basically unsurvivable if not defending. It has very high defense as well, but has very little HP.
- The Lamenting Snowfolk will prioritize casting single-target magic, which includes DALTO, which can mess with evasion strategies. Keep in mind though, that they can also use Clamp which does a lot of damage if they move to the frontline.
- The Mimic has its usual moveset. Its physical moves can be evaded, but it can occasionally cast low damage magic.
- It's recommended to BATILGREF both rows and take care of the Stonefolk and Mimic first before dealing with the Lamenting Snowfolk.
- All enemies can be Frozen if necessary.

- Frontline: Lizardman 2x, Fire Slime 2x
- Backline: Fire Entity 2x, Lizardman Champion 1x
- Lizardmans have around 15-16k HP each. They are very accurate and their swipe hits twice for ~800 each.
- The Lizardman Champion has around 25k HP. It has very high defense, which gets even higher when its HP is very low.
- The Fire Slimes have around 7k HP. Standard moveset.
- Entities have around 5k HP. Their HALITO hits for around 400.
- There is a Referee Intervention giving 5 turns of ATK and CT up to all enemies on their 2nd turn.
- All the enemies have standard movesets in here. They are also relatively slow. The Lizardman Champion may cast Merfolk Command on its first turn, which gives 4 turns of ACC,CT,EVA up on itself and the Lizardman. It's highly recommended to cleanse the ACC buff ASAP, as the strategy for this fight will be evasion. Keep in mind however, the Lizardman still have relatively high accuracy, so they hit you.
- It's recommended to kill the Lizardman first as they're the biggest threats here. Then kill the Fire Entities as they can cast magic. The rest can be evaded.
- All enemies can be Frozen if necessary.
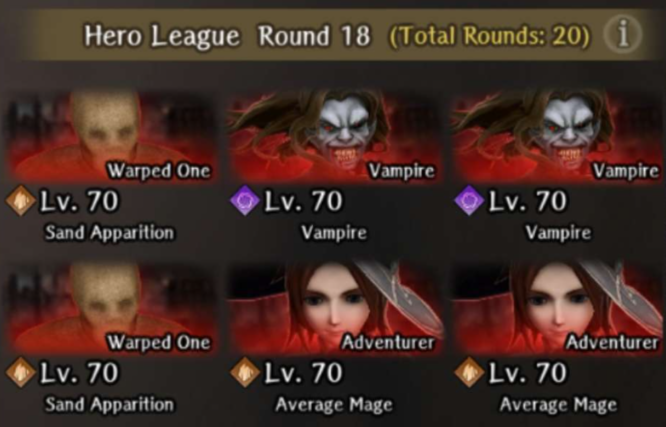
- Frontline: Vampire 2x, Sand Apparition 2x
- Backline: Mage Adventurer 3x
- Mage Adventurers have 7k HP each. Same as usual.
- Vampires have ~18k HP each (basically need to freeze and use a skill). They also take two actions a turn. They do a lot of damage with Vampire Bats, but otherwise have low accuracy on their Eye of Torpor.
- Sand Apparitions have 19-20k HP each. Their ERLIK does around 500. Their Sandstorm can do 700-800 to a row. They can cast BATILGREF. Theycan be crit.
- Sand Apparitions may cast sandstorm which will do extremely high amounts of damage that cannot be dodged. Cortu may help a little bit here with survivability. Otherwise, they don't do much if they use any other skill. They cannot be chilled.
- The Vampires can be frozen immediately, but have somewhat higher HP than previously encountered evasive enemies, so it's recommended to Poised them after being frozen. ESS lvl 1 may not be enough in some cases. They also may not freeze immediately.
- The mages should be taken care of ASAP as they are quite annoying as usual.
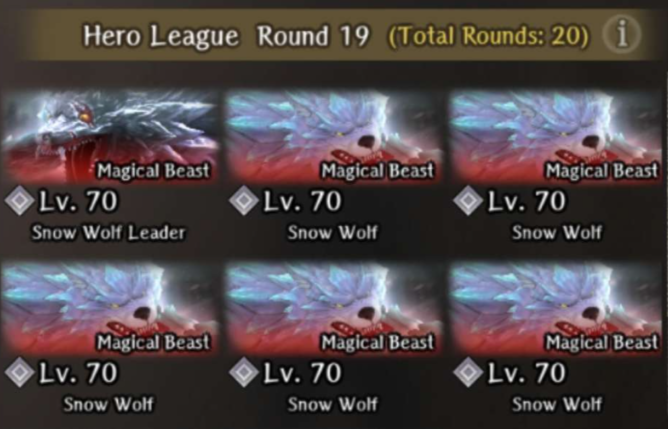
- Frontline: Snow Wolf Leader 1x, Snow Wolf 3x
- Backline: Snow Wolf 4x
- The Snow Wolves have ~10k HP each. Fangs does around 400 damage and can surety. They typically prefer to summon other wolves or buff an entire row on their first turn. They can be crit.
- Snow Wolf Leader has ~63k HP. Frost Fangs can do 1000 and applies 5 stacks of chill. Breath of Cold does 200-300 and applies 3 stacks of chill to a row. It is somewhat evasive, especially after applying chill. It's recommended to MACALDIA and/or apply EVA down on the boss.
- The normal snow wolves will summon other wolves and buff the entire team with ACC,EVA, and ATK up. This basically makes them nearly unevadable unless you have an extremely evasive frontline.
- A common strategy is to use a Knight, preferably a Dark element one with magical beast resistance gear, and Line Cover/All-Around Cover for your front row. This way you can abuse openings and quickly thin out the wolves. It's recommended to kill the Snow Wolf Leader ASAP as it's much more of a threat than the other wolves. However, thinning out some normal wolves first is also very ideal. 350 EVA is enough to evade the Snow Wolves frequently.
- All the wolves including the leader are somewhat vulnerable to sleep. The leader is a bit more resistant, but KATINO can typically sleep several normal wolves in a row.
- All enemies can be frozen if necessary.
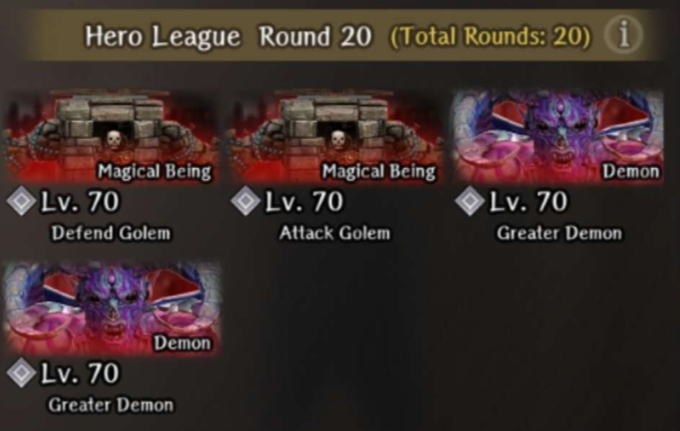
- Frontline: Defense Golem 1x, Attack Golem 1x
- Backline: Greater Demon 2x
- The Attack Golem has ~87k HP. It will cast Offensive Mechanism (4 turns of ATK/ACC up) when 35k damage has been dealt. It will basically kill anything instantly if it lands a hit.
- The Defense Golem has ~30k HP. It does Core Activation at 14k Damage dealt. It will cast Defensive Mechanism at 17k Damage dealt (cleanse debuffs + extremely high def).
- The Greater Demons have around 50-52k HP each. They have a standard skillset. They prefer to cast MONTINO if they are not spellbound.
- Referee Intervention immediately applies 5 turns of a strong ATK, MAG, and ACC down on everyone. It can be resisted.
- One of the easiest fights. All the enemies here can be fully evaded with 180 EVA + MASOLOTU LVL 1 + DILTO LVL 1. You just need to MONTINO both Greater Demons and then dissipate the ACC buff whenever the Golems buff themselves. It's recommended to take out the Attack Golem first, then the rest in whatever order.
- All enemies can be Frozen if necessary.
Game Updates
April 16