Vendetta on the Island of the Wailing Oni
This event is permanently available.
How to enable:
- Complete Abyss 4 Up to a certain part.
Guide for 1st Part:
If you get killed by the Oni in the first run, it will completely reset your request and you will not have a chance to revive with Flames of Resurrection
- Go to Royal Capital, obtain the request "Recovery of Oni Treasure" in the featured tab. You will be given a pass key item. Head to the Port Town Grand Legion from the World Map and talk to the sailor in town with the chat bubble. He will bring you to the Island of the Wailing Oni. You may leave immediately if you wish, as the location is now unlocked on the world map.
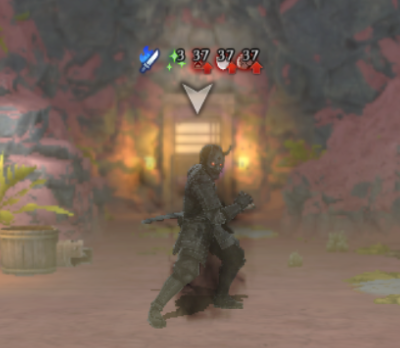
- Enter B1F and interact with the Samurai. Help him, as he is necessary for progression. Give him a Medicinal Herb (You can give from storage) or Dried Abalone. It doesn't really matter which one you do, as long as he has something to eat.
-
Head to B2F, pick up the paper from a dead samurai. Ask Kanosuke to to help translate it. This is now a key item for later. Head to fight the Oni in the bottom left room. After he takes a certain amount of damage, he will be finished off by Kanosuke. However, Kanosuke will turn into an Oni. Pick up the key where the Oni used to be and use the key on every locked room in the dungeon. You will need to pick up the diary/book in the locked room in B3F. You might also need to interact with the shrine in B3F which is at the bottom of the stairs in the top right region in B1F that is accessed via the top middle locked door. Lulunarde will tell you when it's time to cursed wheel and your request will tell you the request is not completable and that you will need to cursed wheel. If you somehow skip Lulunarde's text or weren't paying attention, you can bring up the request in the request list and see if it mentions that nothing else can be done and that you need to cursed wheel.
Oni Fight Details
- Has a lot of HP, several tens of thousands. Spawns with 2 Fire Hobbers in the same row.
- Fire Element and does Fire Element attacks
- Acts once a turn, but after taking enough damage can move twice in a row???
- Does extremely high damage, it's recommended to run a Knight with Knight's defense to deal with this fight.
- Can be Crit. Can be delayed. Recommended to cast Batilgref on him.
- Will summon more Fire Hobbers after some turns or after taking enough damage.
-
Cursed Wheel the event and head to the island again. Save Kanosuke from hunger and hand him the letter that you got previously and he will now follow you so you can read the foreign language.
- Head to the Archive Room (top left locked room) on B1F. It will be locked but there will be a clue to the key. The clue will be on B2F at (X:1, Y:17). Kanosuke will then mark the location of the key on your map with an exclamation mark (X:18, Y:13). Head back to the Archive Room and read all the texts on the shelves. You will need to stop the oni transformation via the shrine.
- Head to the shrine via the middle locked room in B1F. You will need paper seals from the Archive Room (top left locked room in B1F) and salt from the Pantry (bottom left room in B2F). Head back to the shrine and let Kanosuke fix the shrine.
- Head to the Oni and fight it again. Upon winning, head to the middle locked room in B3F and read the diary. Head back to the oni room and go into the treasure room to receive Kanosuke as a bondmate (Bind Tolerance), the gold statue for the request, and a recommendation from Kanosuke for his Samurai Dojo.
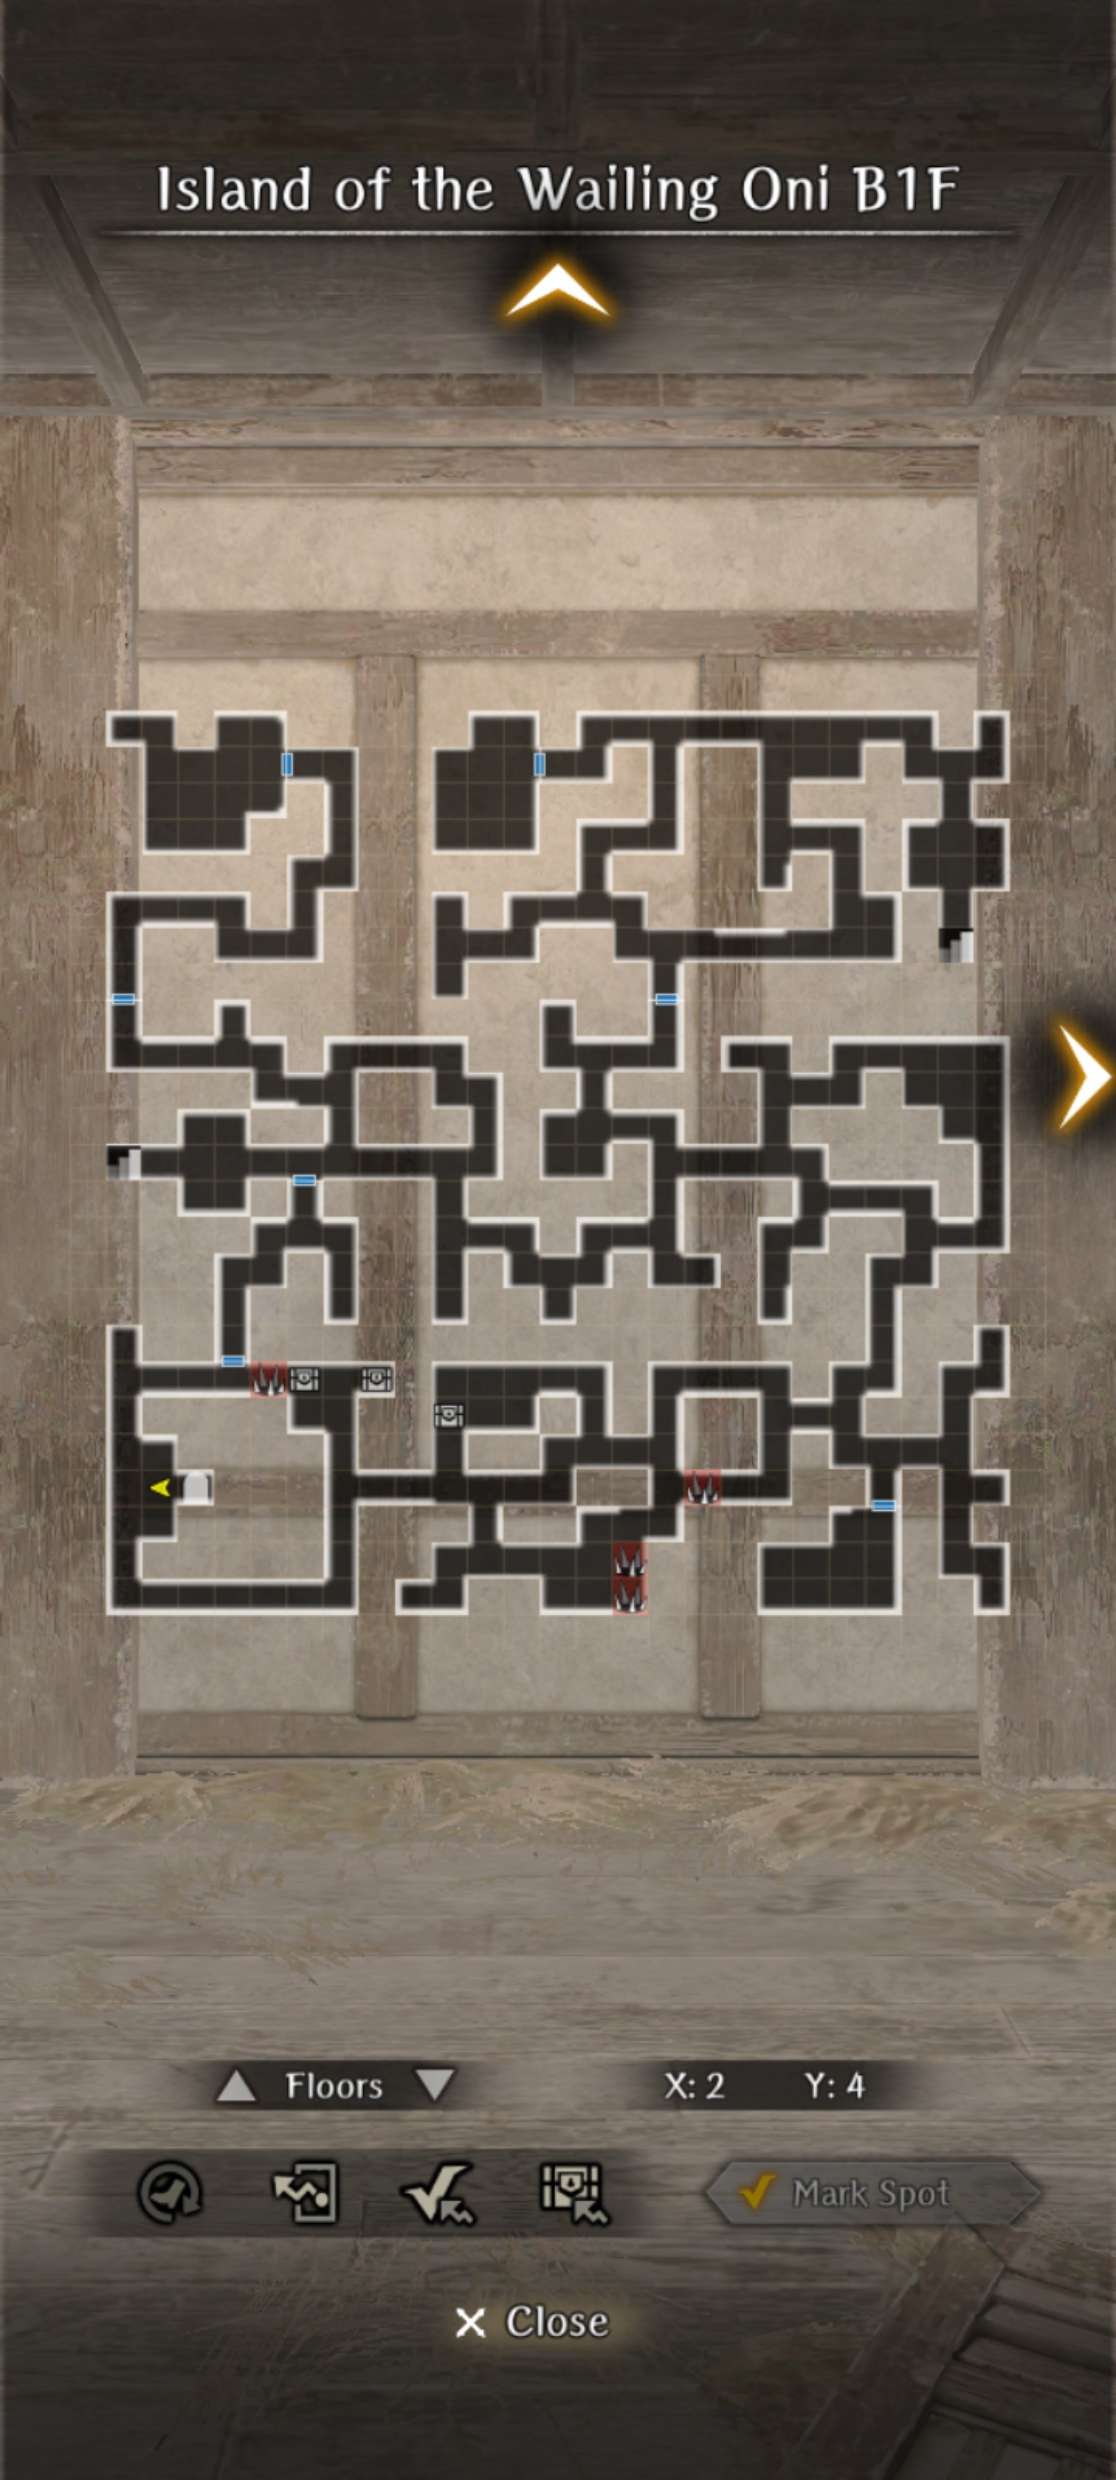
B1F
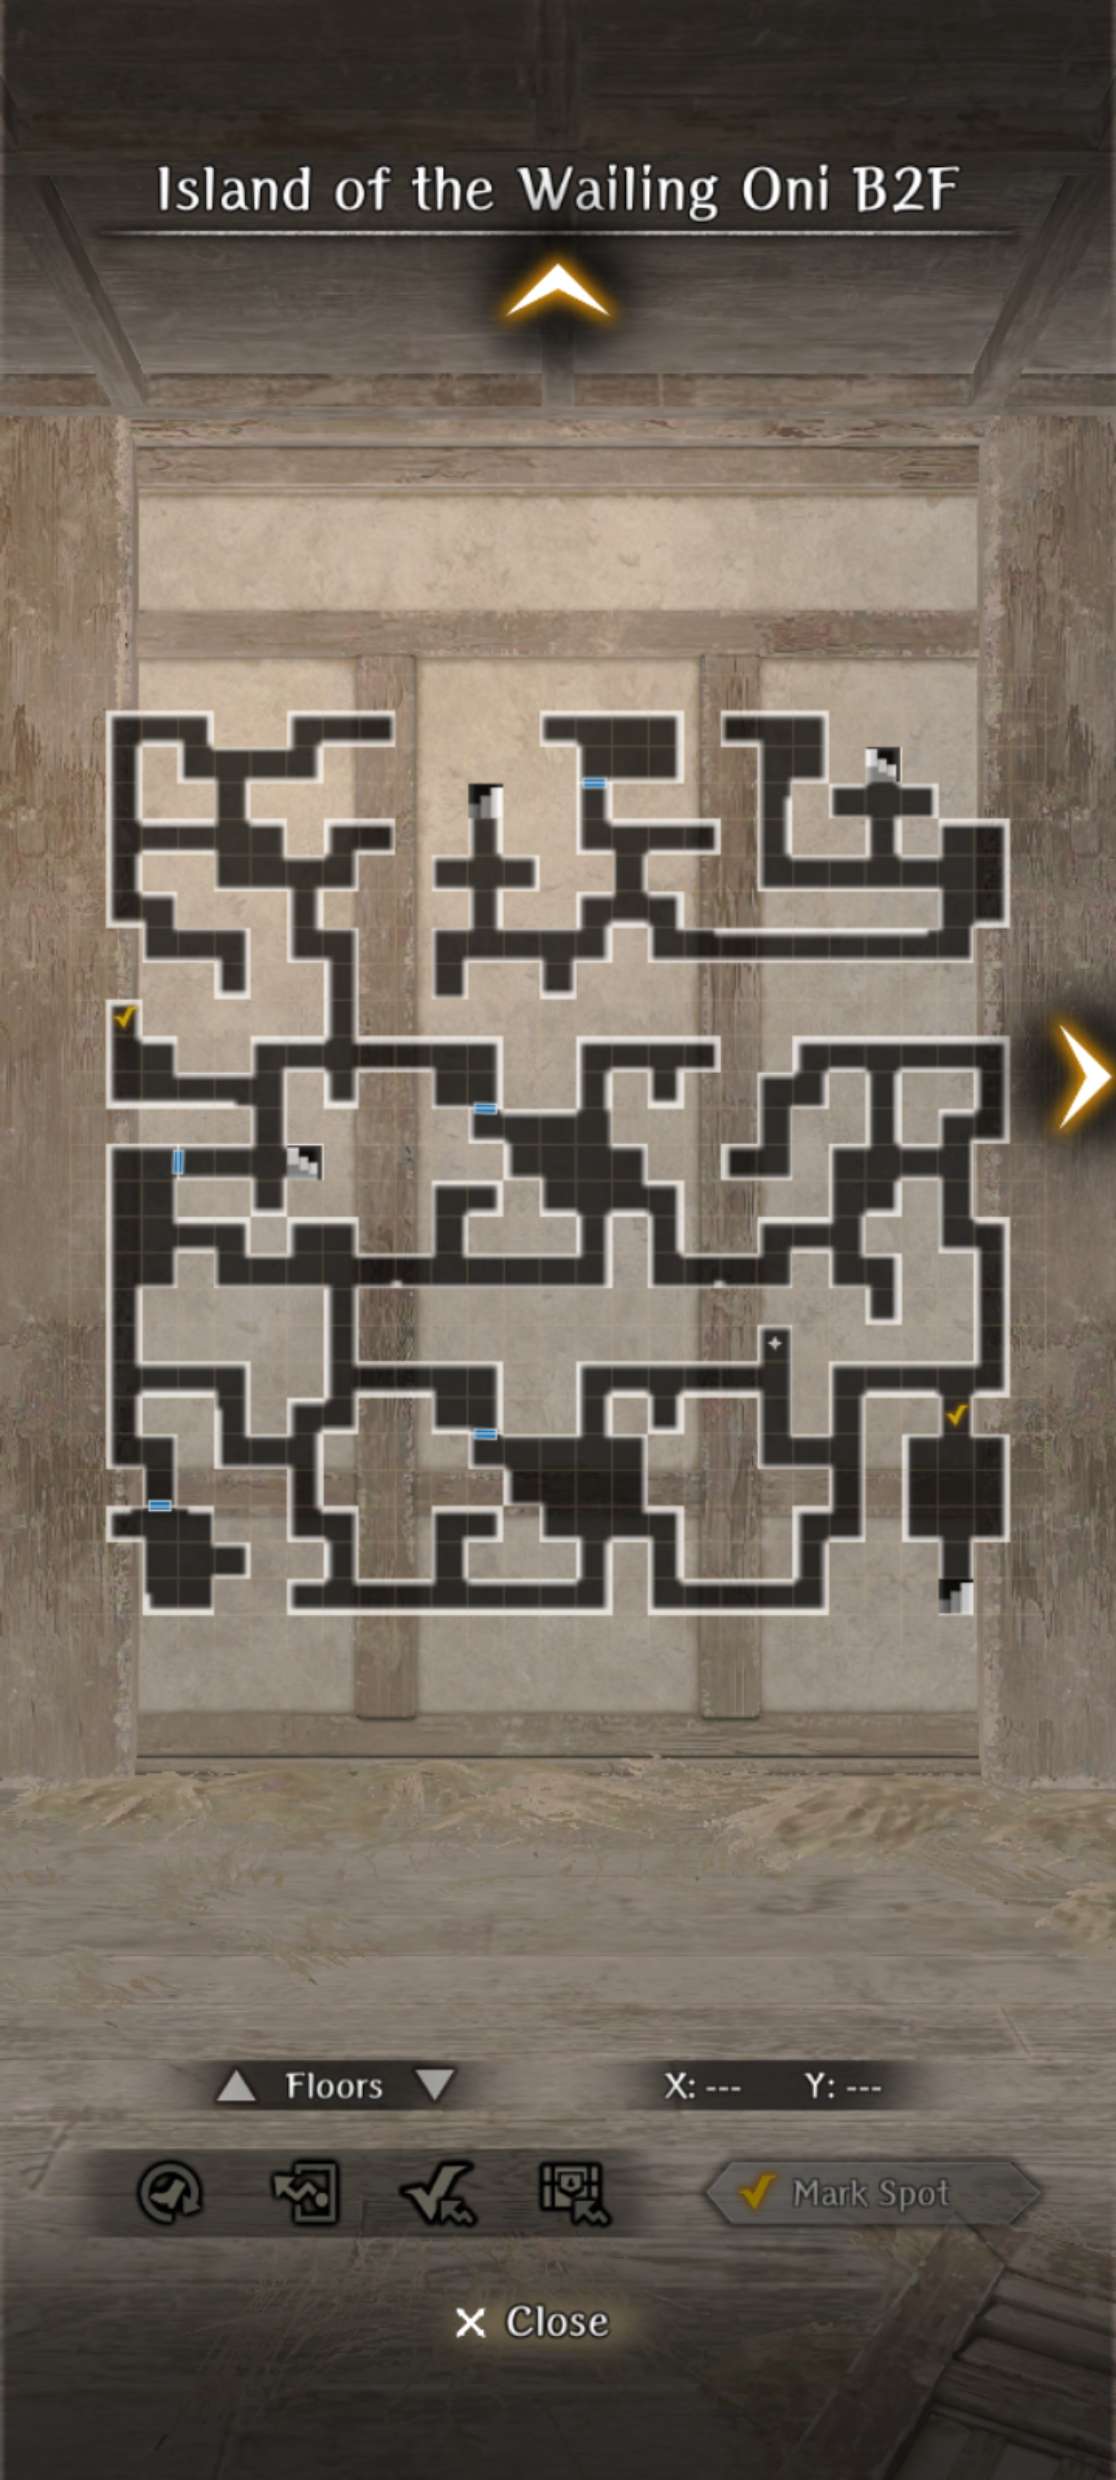
B2F
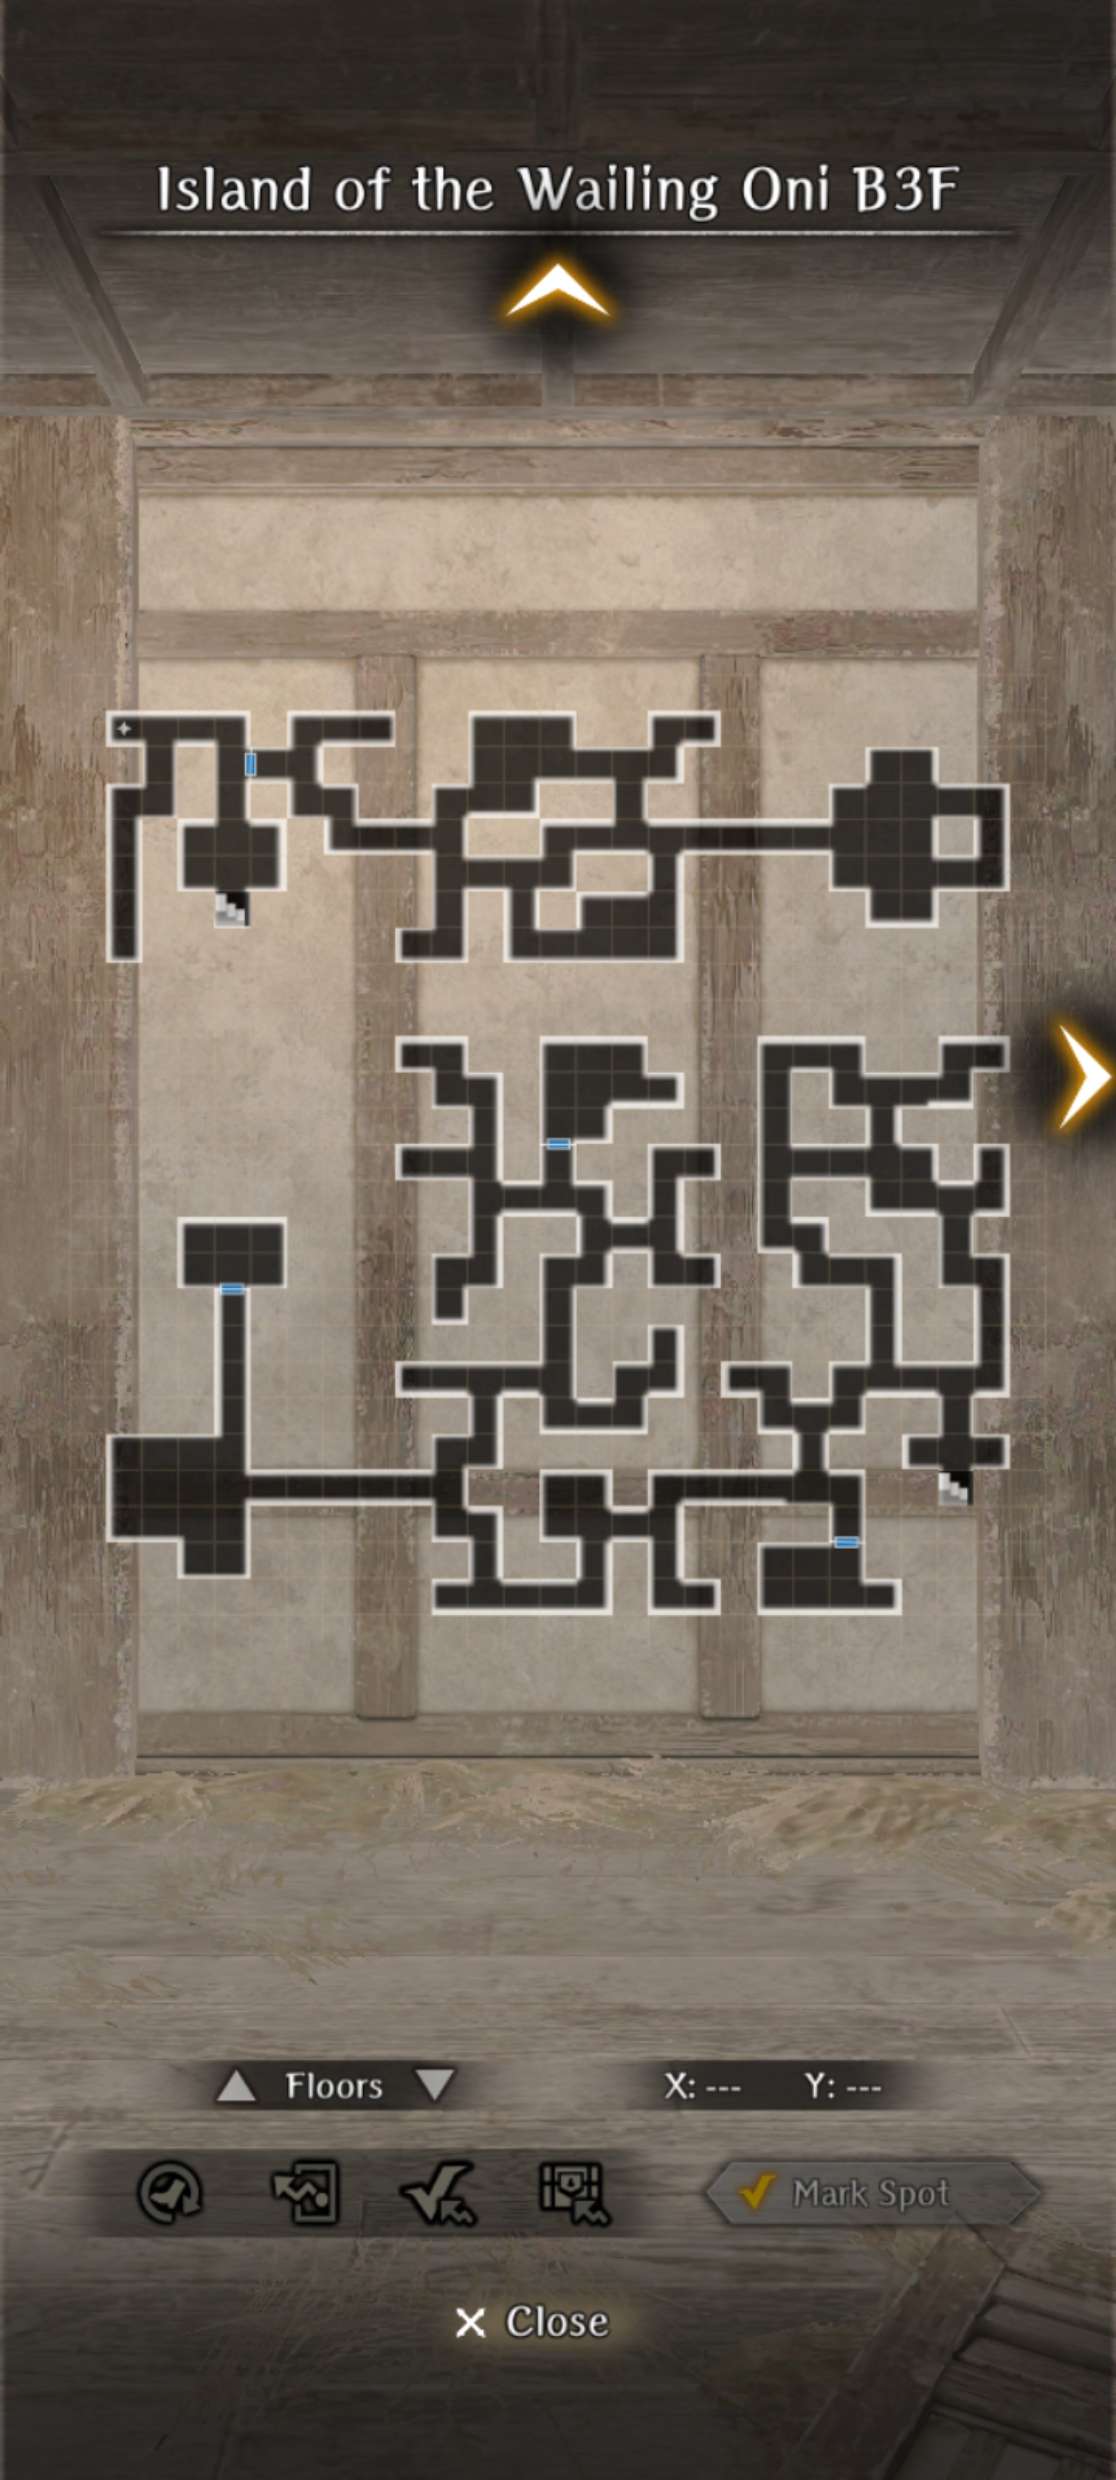
B3F
Guide for 2nd Part:
Neutral or Good Route
You will need to have cleared Abyss 4 in your current route (Bad Ending is fine) to be able to unlock the 2nd part of this event. In addition, you will obviously need to have successfully completed Part 1 of this event.
- Head to Rock-Heart Style Dojo from the world map. You'll be immediately thrown into an unwinnable fight but the enemies also do not deal that much damage. Simply stay alive until the fight is over.
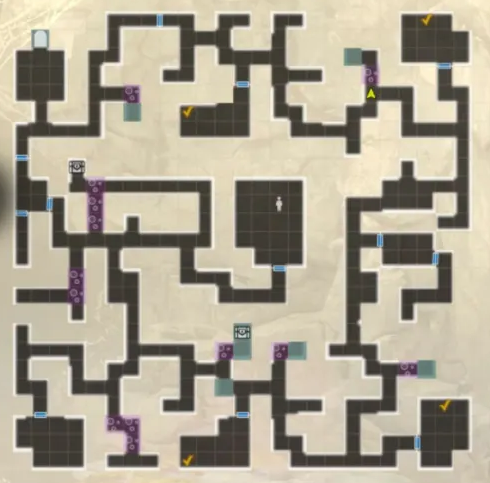
- You will need to go through three different trials in order to unlock the Samurai class for the MC. Head into the first trial, which will place you in a map with a lot of candles all over the map. The first candle by the entrance will always be the first candle that needs to be lit. Upon lighting the candle, it will indicate the direction you need to go to light the next candle and so on. If you forgot the instructions or skipped over them, you can interact with the last candle lit again in order to get instructions. The next candle that needs to be lit will always be on the same X or Y axis as the previous candle, and not simply just the closest candle in that general direction. After successfully completing the puzzle, the final room will unlock and you will fight a deputy samurai 1-on-1 as samurai MC. After winning the fight, head back to the entrance to unlock the next trial.
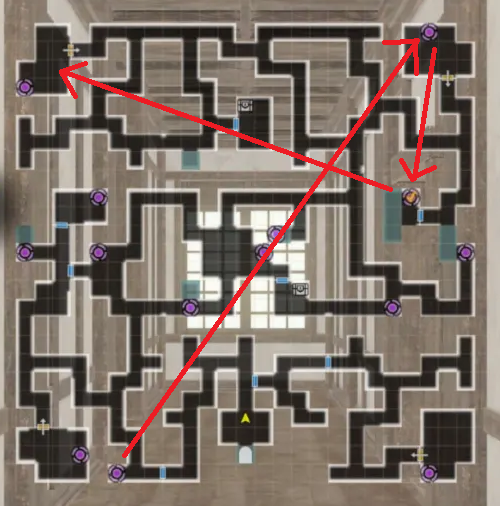
- In the second trial, you will need to carry some water to a final location without spilling too much of the water on the way there. Every time you engage in combat, upon getting hit, some of the water will spill out. If you spill all the the water, you will need to head back to the entrance to get more. The main gimmick of this trial however is that the destination is located in a room that is only accessible via teleport pads scattered throughout the map. See maps below for fastest route to the correct location. Once again, you'll fight a deputy samurai 1-on-1. Return to the entrance to unlock the next trial.
- In the third and final trial, you will be heading the 4 different rooms on the map and defeating a samurai 1-on-1. The fights will be similar to the previous final fights, except that you'll have more resources. Each disciple will imbue a certain element during the fight, and you can counter that element with your own imbue. They also have their own patterns of fighting but generally they can all be defeated using quickdraw stance provided they don't have an evasion buff. In addition, if they are known to use quickdraw stance, then only use your own quickdraw stance after they use theirs. After defeating all 4, head to defeat the deputy samurai in the bottom left room that has been unlocked. You then head to the center room of the map to meet the old man, in which you will need to successfully pass three QTE events in a row. Failure has you take damage, and you can essentially fail twice before you are killed. However, you may select the withdraw option to heal up before trying again. Finally, upon succeeding this event, you'll be thrown into a fight against Touma (backline) and 3 normal samurai in the frontline. While your MC is still a samurai with fixed equipment, you have access to your full team of adventurers. Successfully winning this fight unlocks the Samurai class change lantern for the MC.
Evil Route
If your MC is evil however, a different route is presented below.
- The old man doesn't like you, so you will be siding with Touma at the start instead and fight the old man. Similar to the normal route, you only need to survive 3 rounds.
- Complete the three trials as before. Head to challenge the old man. You will have to do the QTE event from before but this time it will get much more difficult. Afterwards, you have two options here, either to kill the old man or kill Touma.
- If you killed the old man, you will receive a white 1* silver-tier katana with humanoid-slayer. If you killed Touma, you will be able to obtain the Samurai lantern instead.
Ascetic Grounds of the Body
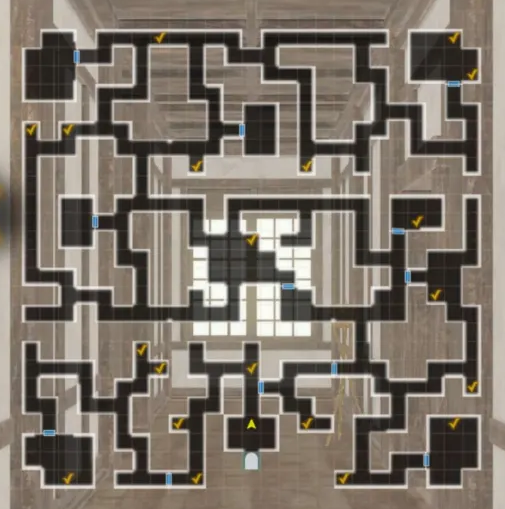
The map layout can be different, but the lamps are always in the same location
Ascetic Grounds of Technique
Ascetic Grounds of the Mind
Optional Boss Fight
Deranged Sword Fiend
- Non elemental Humanoid type. Always has 3 actions per turn. Has around 40k HP. All of his attacks have a chance to apply confusion. He also has around 150 Surety Evasion. Has around 130-150 ASPD (varies)
- His attacks can be entirely evaded but will need very high evasion (400+ total with buffs). 160 ASPD is enough to outspeed him turn 1 consistently.
- On his first three actions he will always use an elemental-bearer skill, debuff a row with DEF and ATK down, and then give himself 40 turns of dispellable evasion up (Very high evasion boost). It's recommended to dispel this evasion buff ASAP.
- He will typically just use his turns to use normal samurai attacks (Decisive Torso Strike, normal attacks, Bamboo Splitter, Quickdraw Stance). The quickdraw stance does enough damage to instantly kill a unit even in the backrow that is defending, so it's recommended to cancel it with a magic damaging skill.
- After he takes around 8k damage, he will apply 6 turns of Self-Healing on himself out of turn, which immediately recovers 1000 HP and 500 per his action. Whenever this Self-Healing buff is naturally over, he will re-apply it.
- After taking around 20k damage, he will self-buff with 40 turns of DEF, MDEF, and CT UP. At this point, all of his attacks do signfiicantly more damage. He will also gain a chance at evading magic damage (so be careful if relying on Malefic Wind to dispel his buffs).
- Upon being defeated, he will drop some Red Gourd currency, some gold-sell items, some Unusual level junk, and a small chance at obtaining a Oni Island Yoto, which is a unique Yoto Odachi that has a chance to inflict confusion per attack at the cost of reducing self DEF/MDEF.